Note from Sean: When it comes down to it, the success of a blog ultimately depends on both the quality of the content you write, and your ability to share your content successfully.
There are a ton of options to help you do that – some are fantastic, some not so much.
Luckily, Charles Bordet of Become a Top Performer did all the research for you and found 59 of the very best tools for creating and sharing remarkable content across the web. I personally found a ton of valuable resources from this, I’m adding to my regular workflow.
With that, enjoy!
—
You spend dozens of hours on a single blog post. You rewrite it, edit it, polish it, and make it the best you can.
It is time to hit publish, but as you give a last look at your article, you realize it sounds like any other piece of content on the internet. Same words, same advice, nothing outstanding.
It’s frustrating, right? You try your best, but creating something original and remarkable is not easy, by definition.
It doesn’t have to be this way, though.
Writing the perfect article and creating remarkable content on a regular basis is a process that can be broken down into manageable steps. There are tools out there that will help you with each step towards the creation of your perfect post.
Writing short articles that don’t provide a lot of value to your readers doesn’t work anymore. That might have worked back in 2005 when you could count bloggers on your hand, but today it’s just a waste of time.
What works today is creating outstanding content that gets noticed. It gets noticed by your readers, of course, but not only. Influencers can recognize good content and help you promote it to even more people.
Writing a crappy post might help you get a bit of traffic after the publication, but it’s not worth the effort.
Besides, writing great content will help convince your readers that you’re worth listening to. They will like you right away and start to trust you more. As a result, they’re more likely to buy your products and follow your advice.
Finally, writing remarkable content doesn’t just give you traffic right after the publication. Instead, it keeps bringing you new readers and subscribers months after it is out.
If you’ve been a regular reader of Location 180, you can’t have missed the recent post from Alp Turan: “How Complete Newbies Can Land Killer Guest Posts: The Ultimate Guide.” It is an excellent example of what remarkable content is.
I reached out to Alp to know what kind of results this post did for him. He got:
- 300+ subscribers (and counting)
- a relationship with Sean and Liz
- two new guest blogging opportunities
- a joint venture offer
- a new client for his consulting business
Remarkable content will give you remarkable results. It would not happen with a short crappy listicle such as “5 Quick Ways to Land Guest Posts.”
Remarkable content stands the test of time.
So how do you write remarkable content?
It seems such a daunting task! It takes time, dedication, hard work, and you don’t want to spend 20 hours on each of your articles.
Don’t worry.
The process of creating remarkable content can be broken down into just a few key elements:
- Finding the perfect blog post idea.
- Engineering a remarkable headline.
- Writing the best outline possible.
- Writing a sh***y first draft.
- Making extensive and insightful research.
- Editing your first draft.
- Illustrating your article to make it attractive.
- Promoting the hell of your article as if your life was depending on it.
If you do EACH of this steps perfectly, your post will stand out.
Not only will it be perfect, but it will bring you hundreds of new subscribers right after publication, and still months later.
For each step of the process, I have prepared for you the exact tools that will make it 10 times easier for you.
All you have to do is pick a tool, do what you’re supposed to do with it, do it well, and you’re done. That’s it! Sounds simple, doesn’t it?
To help you navigate into this and help you find the RIGHT tool for your problem, I made a table of contents:
- Tools to Find the Perfect Blog Post Idea
- Tools to Engineer a Remarkable Headline
- Tools to Write the Best Outline
- Tools to Write Your Sh***y First Draft
- Tools to Write in the Zone and Double Your Productivity
- Tools to Make Extensive and Insightful Research
- Tools to Edit and Transform Your First Draft
- Tools to Illustrate Your Post and Make it Attractive
- Tools to Promote the Hell of Your Post
- Tools You Wouldn’t Even Think Of
To help you keep the list and refer to it later when you need it, I created a condensed version in PDF that you can download right now by clicking here.
1. Tools to Find the Perfect Blog Post Idea
The first step towards creating remarkable content is finding the perfect blog post idea.
You could write the best article on how to write a check, but chances are that nobody would care about it. However, if you write an awesome article on how to guest post, which is something a lot of people care about, you will more likely get a lot of success with it.
If you want to learn how to find the perfect blog post idea, here are a few suggestions for you:
- The Ultimate Guide to Never Run Out of Blog Post Ideas
- How to Find 20+ Blog Ideas Your Audience Can’t Wait to Read
- The Ultimate List of 95 Blogpost Ideas for Creating Craveable Content to Share on Social
And here are the tools that will help you do it quickly and efficiently:
Quora
Quora is a great place to find new blog post ideas because they come from people like you and me.
Type your topic at the top and select either:
- Quora topics.
- Questions.
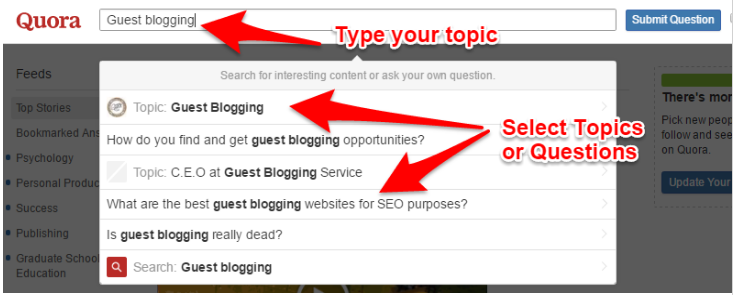
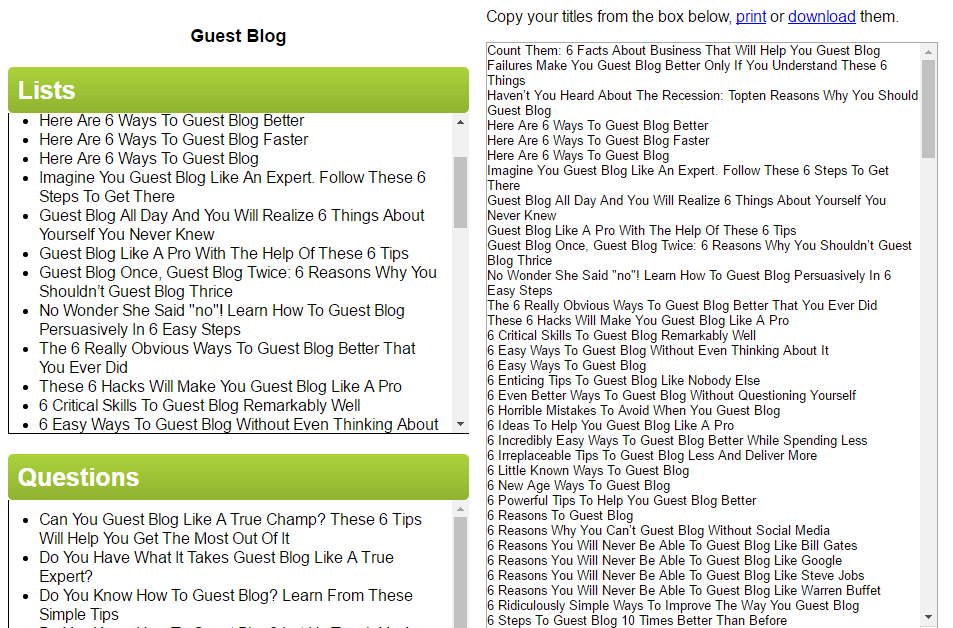
For example, select Topic: Guest Blogging. You will land on a new page with new blog post ideas submitted by people from your audience.
Join over 40,000 people who have taken our 6 part freelance writing course. Sign up below and let’s do this together.
By entering your email address you agree to receive emails from Location Rebel. We'll respect your privacy and you can unsubscribe at any time.
BuzzSumo
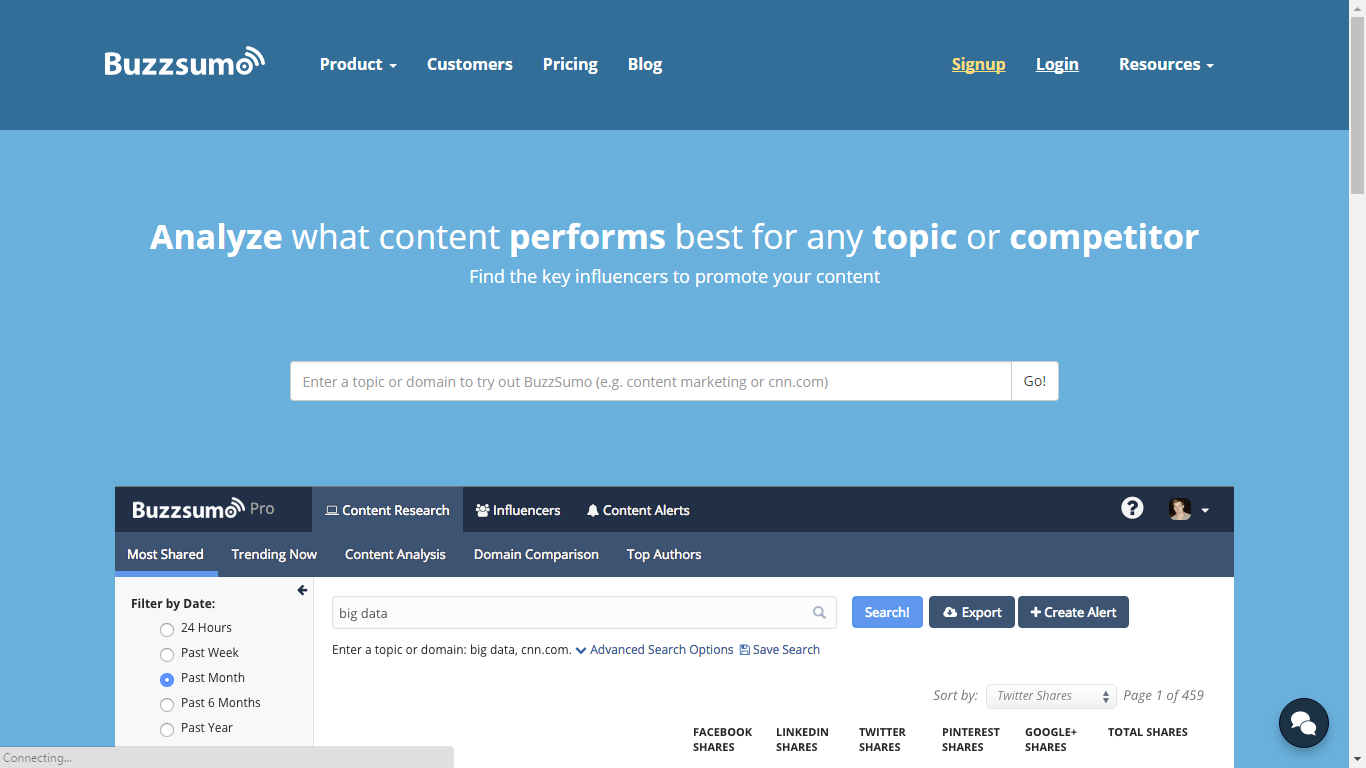
BuzzSumo takes a different approach. Instead of going to the source (i.e. people), this tool looks at published blog posts and tells you what worked well.
For example, I typed Guest Blogging in the search bar, selected Last Month to get recent results, and finally ranked the results by Most Twitter Shares.
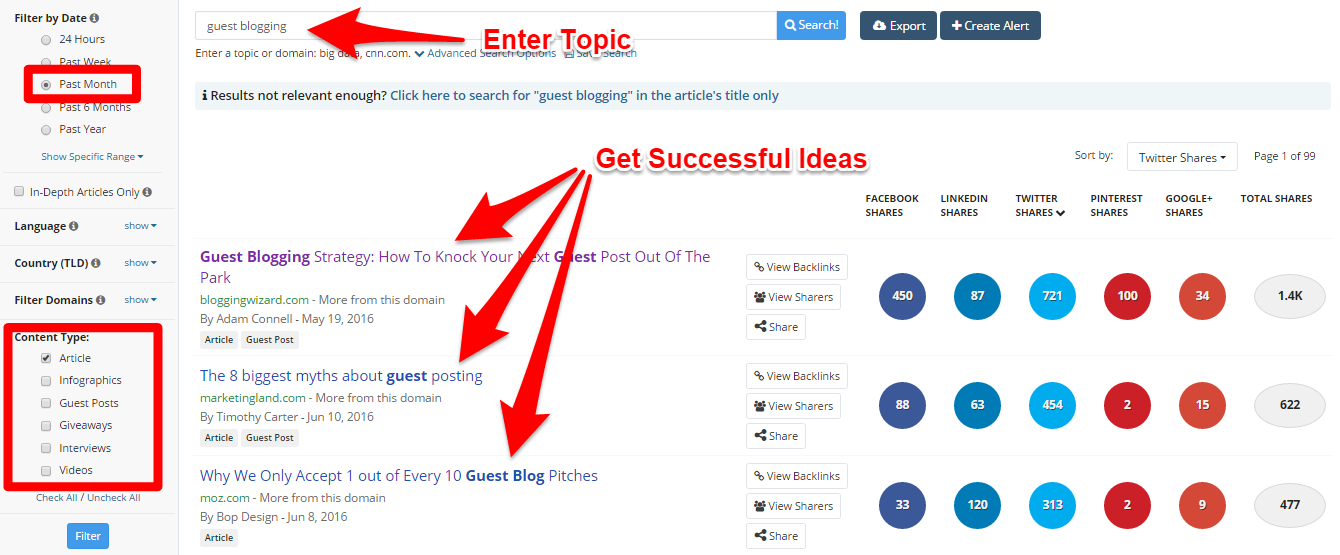
You can see which articles get a lot of shares, take a look at them, and then find a way to make something even better (for example by using the skyscraper technique).
Portent’s Content Idea Generator
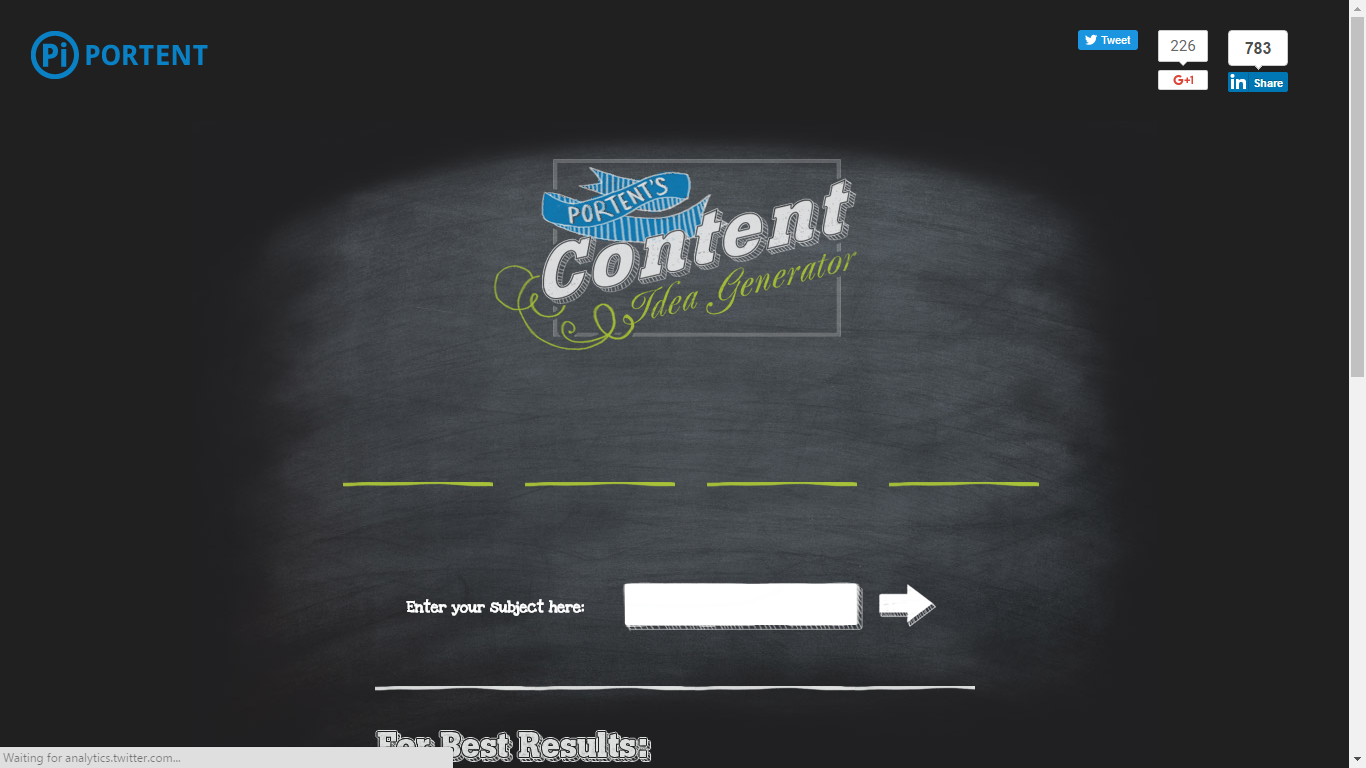
With the Portent’s Content Idea Generator, you only need to enter your topic and it will give you a headline.
Because it’s just an algorithm, you will sometimes get generic and boring headlines, but you will find some nice suggestions here and there from which you can build upon a better headline.
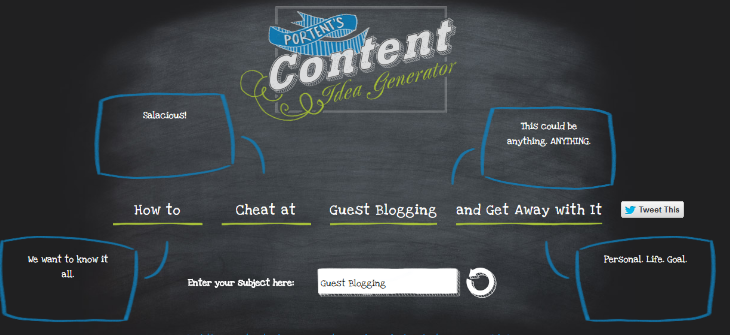
Here are some pretty good headlines I could find:
- How to Cheat at Guest Blogging and Get Away With It
- Unbelievable Guest Blogging Success Stories
- An Expert Interview About Guest Blogging
- 12 Ways Guest Blogging Can Make You Rich
- Why You’ll Never Succeed at Guest Blogging
The Blog Post Ideas Generator
This tool will suggest incomplete headlines to give you more ideas.
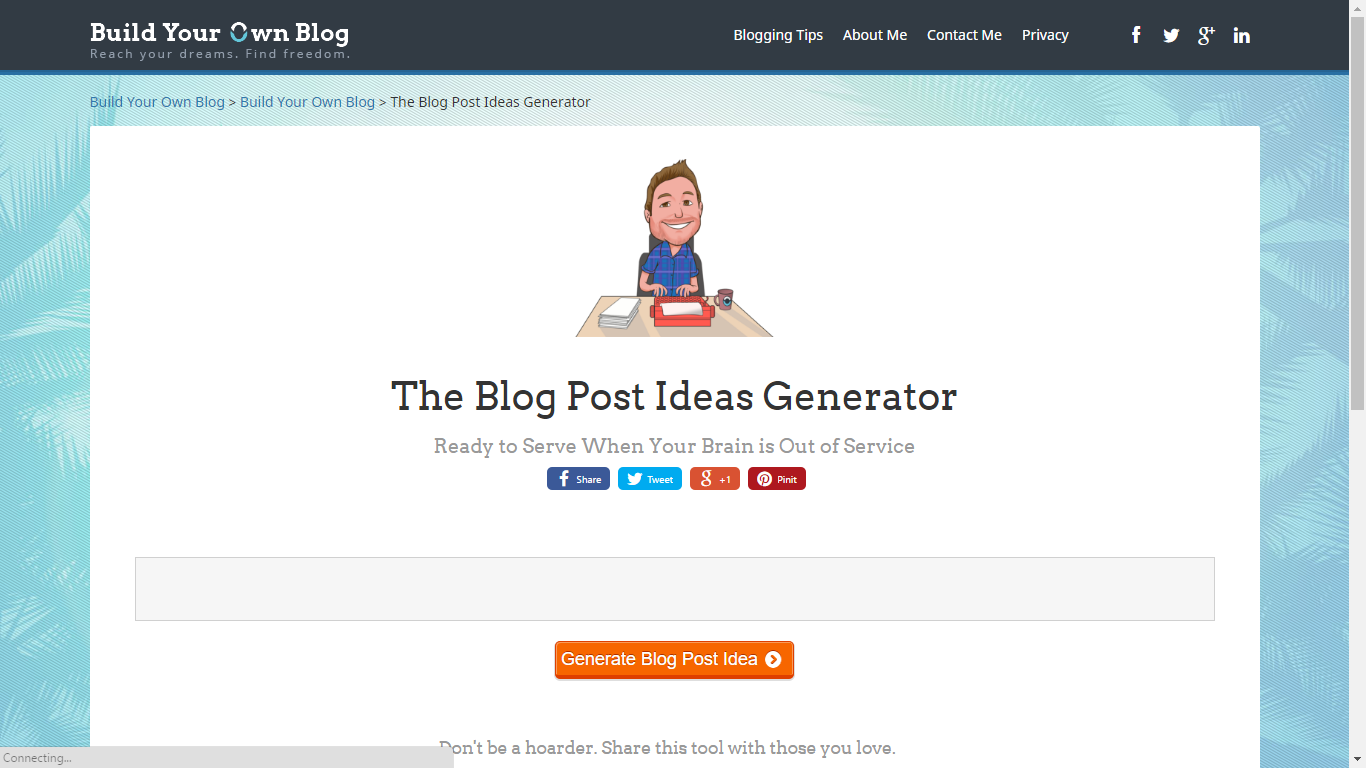
You will usually need to complete the headline with your topic keyword, the solution you’re offering, or a burning pain of your readers.
The goal of this tool is not to give you a headline, but more to get your inspiration running to find new ideas.
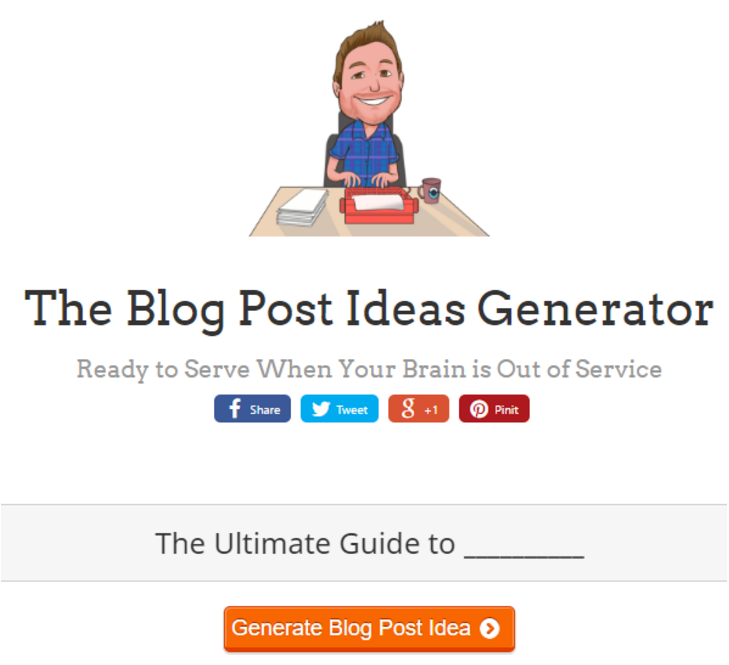
Look at these examples I could find, sometimes after minor modifications:
- The Ultimate Guide to Guest Blogging
- Things That Nobody Told You About Guest Blogging
- 7 Reasons Your Guest Blogging Strategy is Doomed to Failure
- Guest Blogging: Top 10 Examples of Beautiful Pitches
- 5 Guest Blogging Rules You Should Break!
ContentIdeator Generator
Content Strategy Helper Tool – Version 3
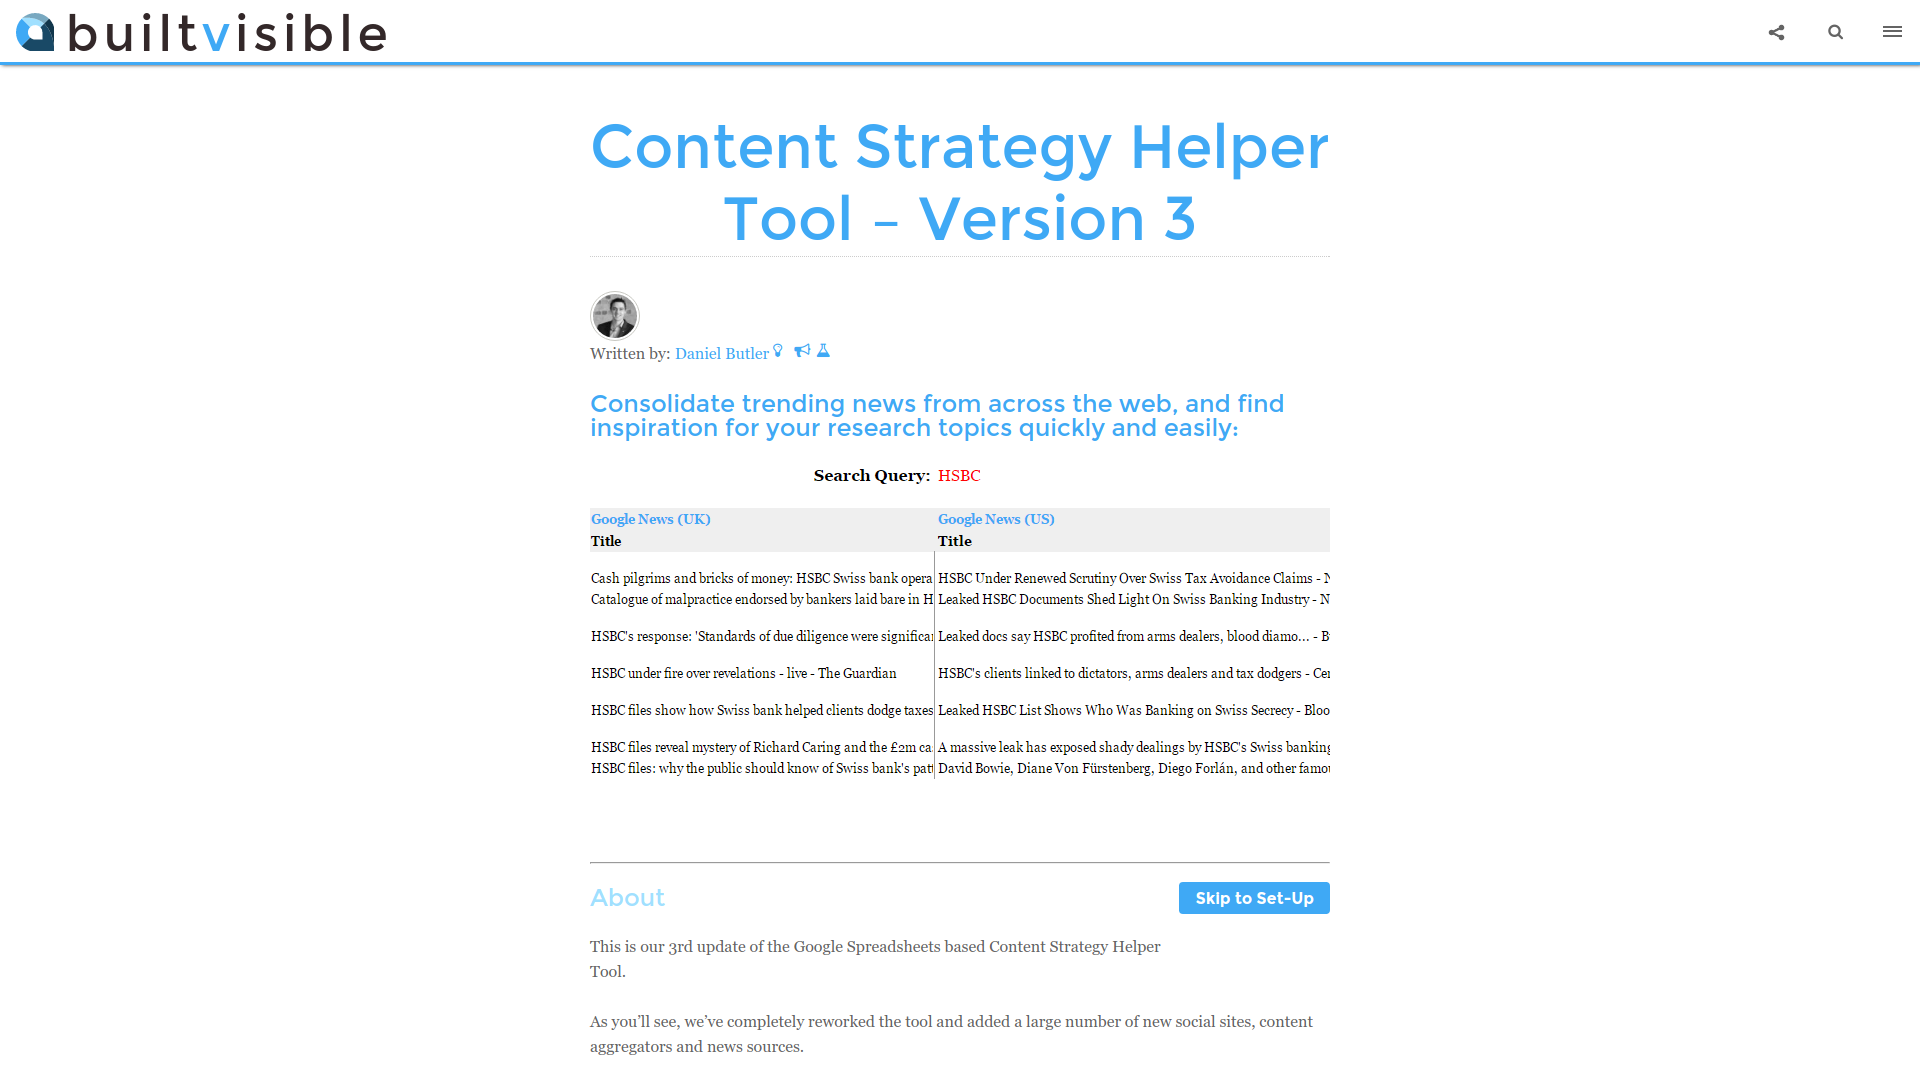
This tool is unique in its genre. It’s not just a “put your word and get suggestions” tool, but a sophisticated spreadsheet that will tell you:
- What’s trending across many social or news channels (Twitter, Google Search, Reddit, etc.)
- What is the most successful recent content around a topic you choose.
- Tons of information about influencers in your niche.
This tool use goes way beyond just finding blog post ideas, but let’s focus on that for now.
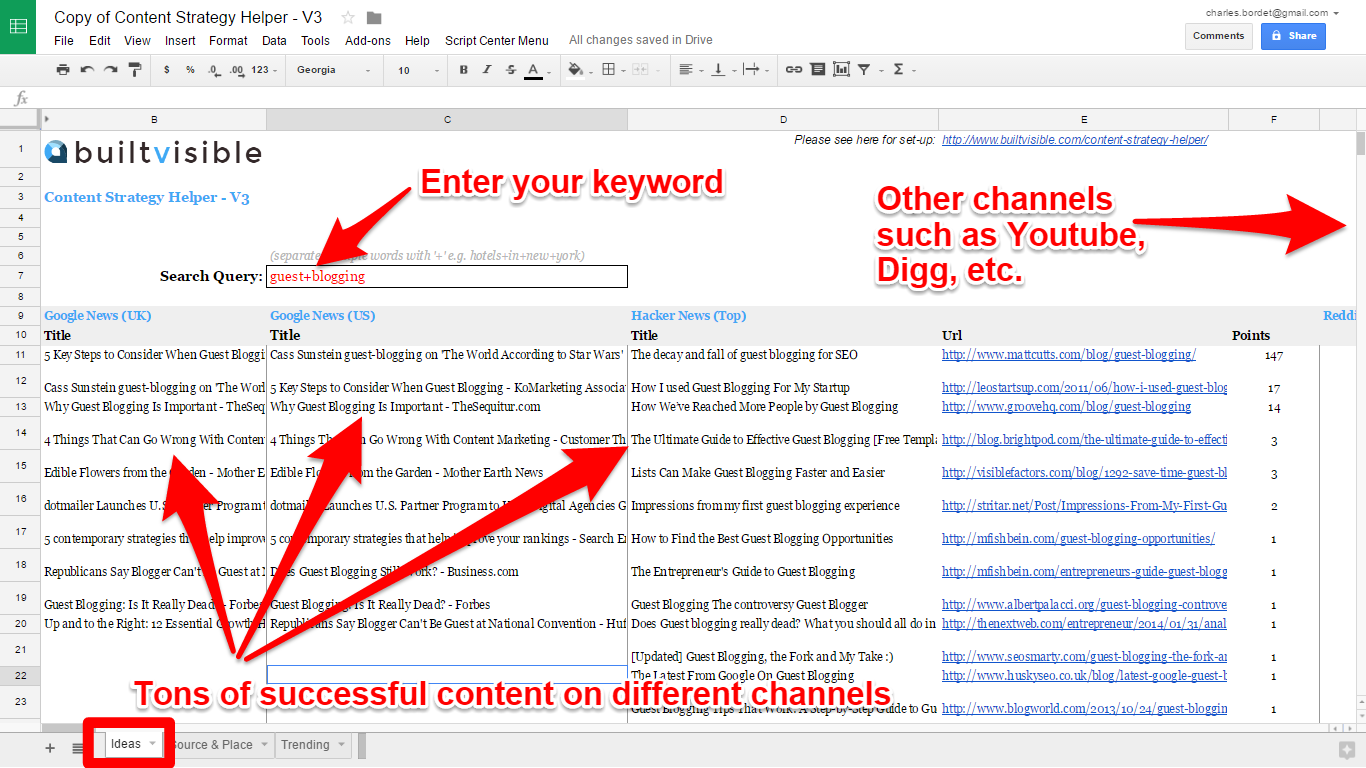
They explain here how to set up the tool to use it. It’s actually a Google Spreadsheet, and all you need to do is make a copy for yourself. They also explain you how to copy/paste the script, but for some reason I didn’t have to do it, it was already filled.
Then, on the first tab Ideas, enter your keyword, and get tons of successful articles for inspiration:
Tweak Your Biz Title Generator
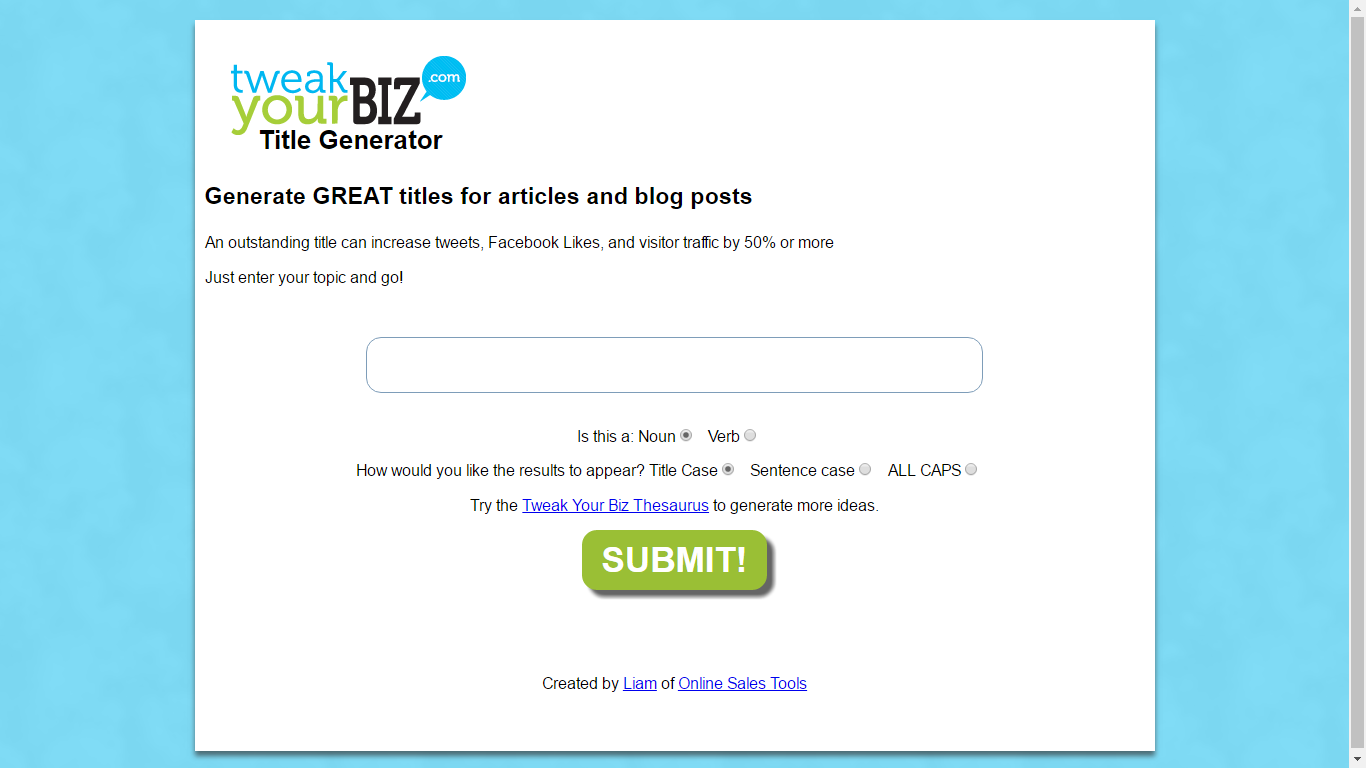
The Tweak Your Biz Title Generator first asks you whether your keyword is a noun or a verb.
This allows them to provide you with more relevant headlines and avoid the so common Here are 10 Ways to Content Marketing Better, which doesn’t make sense (in this example, my keyword Content Marketing is a noun and it was considered as a verb).
The tool separates the headlines between Lists, Questions, How To, etc., and also let you download the whole list of ideas, so that you can put it in your blog post ideas swipe file (you should have one).
As with all headlines generator, all ideas aren’t good, but this tools gives you so many ideas, that if you take only the top 10%, you’re still left with dozens of ideas!
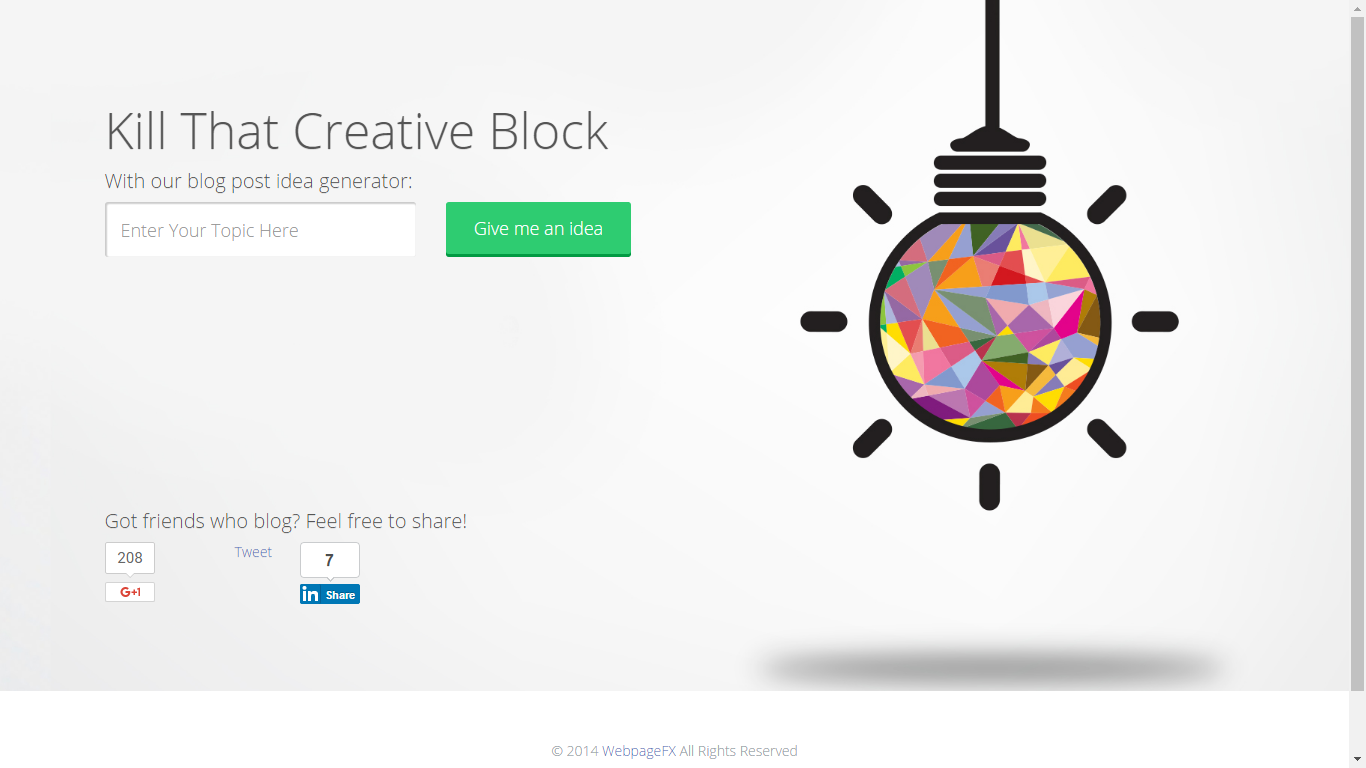
WebpageFX Blog Post Idea Generator
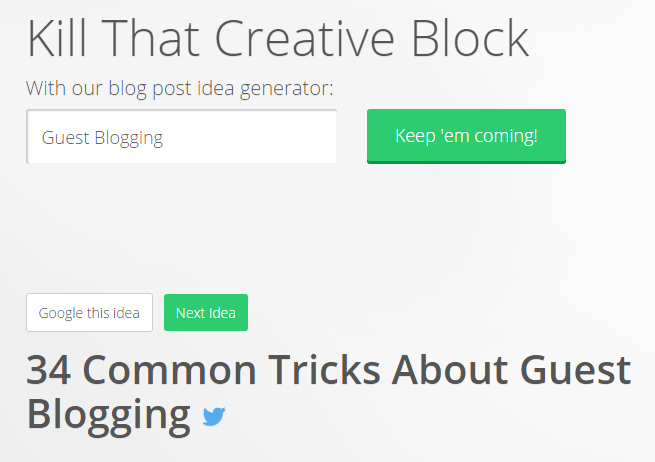
This headline generator will give you one headline at a time.
I find it better to get only 1 headline (with the possibility to generate others) rather than 100 at once, as in the latter case it can get overwhelming and leave you stuck with too many choices.
By giving you only 1, you can give it all your consideration and think of how you could tweak it. Additionally, the WebpageFX Blog Post Idea Generator provides you with a button to google the idea, and thus find other similar content ideas.
HubSpot’s Blog Topic Generator
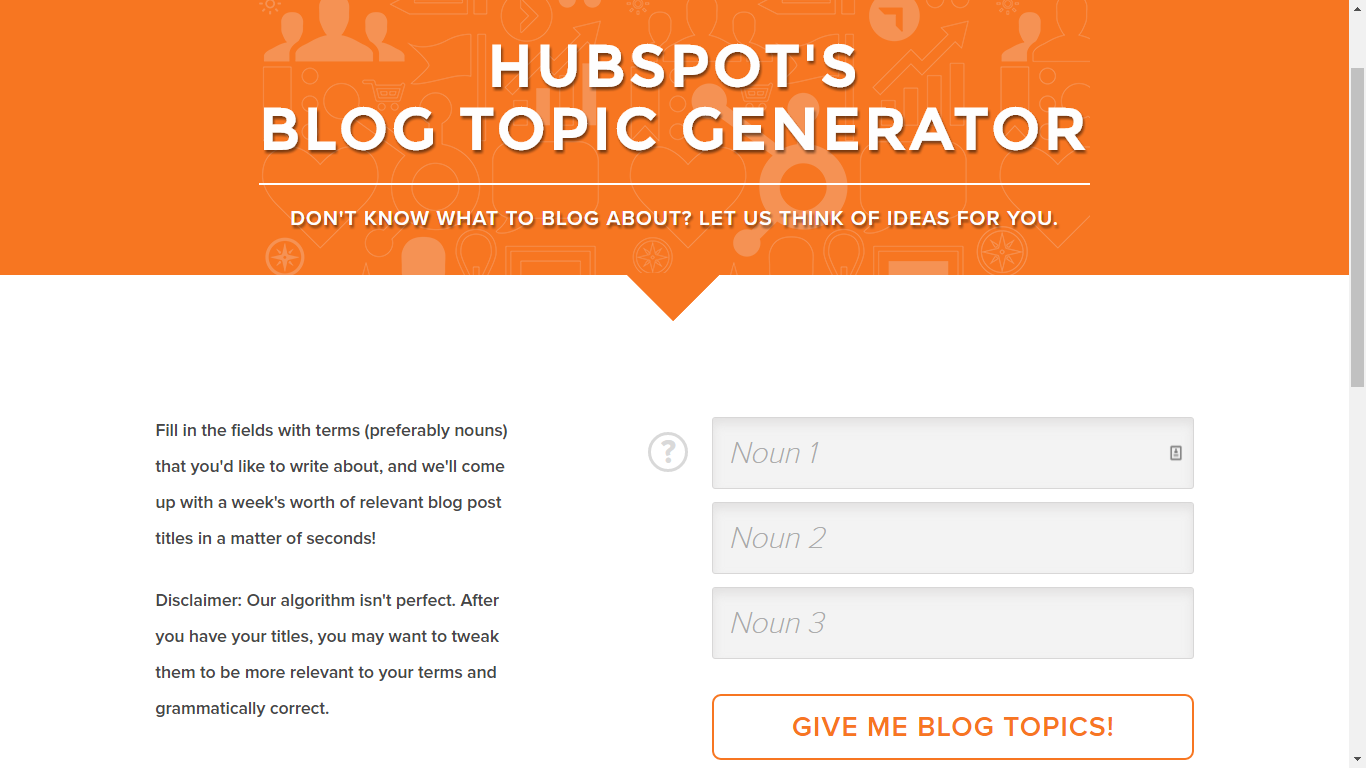
The HubSpot’s Blog Topic Generator is one of the most known topic generator out there. Yet, the first time I used it, I thought it was total crap.
Now coming back to it, I realize it gives some new fresh ideas. Of course, they’re not perfect, but they’re still worth studying when you lack inspiration.
Look at these ideas:
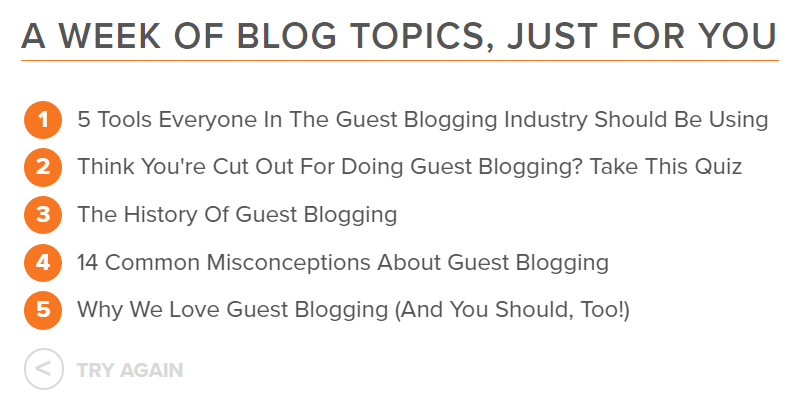
Here is how to tweak these headlines:
- 5 Tools Everyone Should Be Using When Guest Blogging
- Are You Ready For Doing Guest Blogging? Take This Quiz
- How Guest Blogging Was Back in 2007, and Why It Doesn’t Work Anymore
- 14 Common Misconceptions About Guest Blogging
- Why We Love Guest Blogging (And You Should, Too!)
The #4 and #5 were good enough without modification. For the rest, the suggestions gave me some extra inspiration to get these ideas!
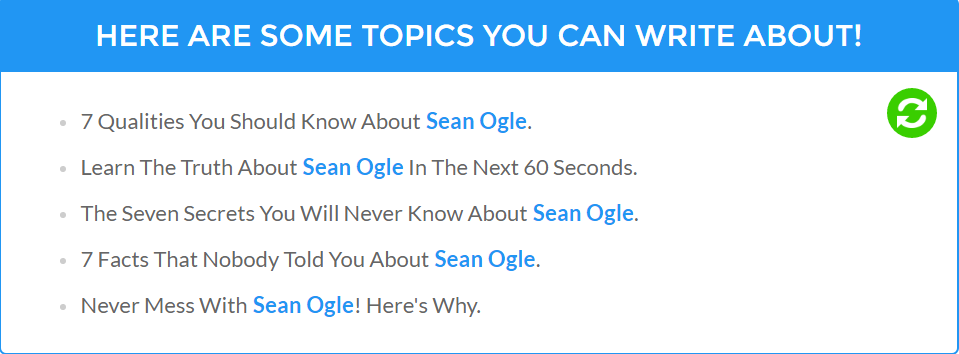
SEOPressor Blog Title Generator
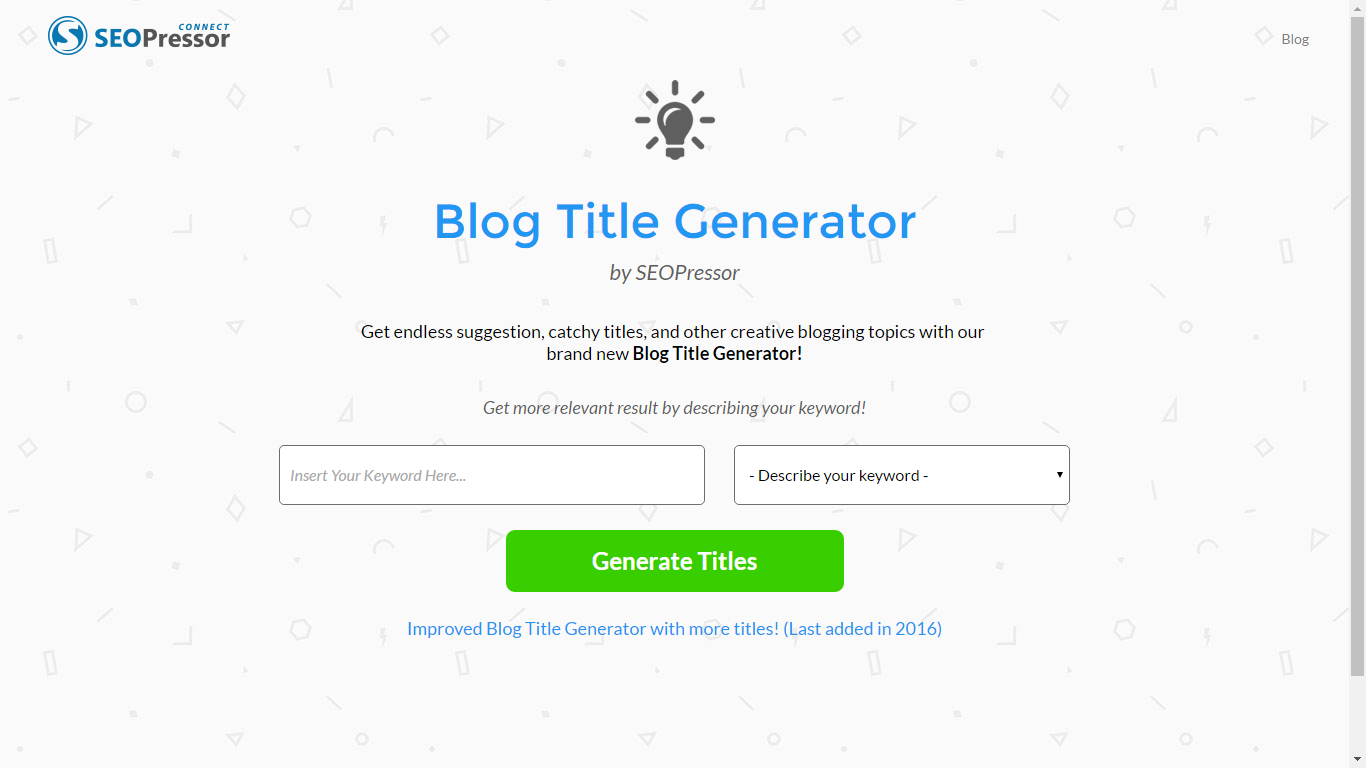
Look, another blog title generator!
This one stands out from the rest by giving more information on your keyword: Is it a generic term, a brand/product, an event, an industry, a location, a person’s name, or a skill?
For example, you could type Sean Ogle and say it’s a person’s name.
Now you can write an article about Sean and try to get his attention! This would work well on well-known blogger such as Neil Patel or Pat Flynn.
Now, if I take Guest Blogging and say it’s a skill, I get some pretty good headlines too:
Tools to Engineer a Remarkable Headline
In the previous section, we saw a bunch of headline generators. But how do you know if they’re good? Can you use them right away without any tweak?
Most of the time, if you don’t want something too generic, the answer is no.
You don’t have to play the lottery though. First of all, there are tons of articles and courses out there that will teach you how to write the perfect headline:
- How to Write Magnetic Headlines
- The Step-by-Step Guide to Writing Powerful Headlines
- How to Write Headlines That Drive Traffic, Shares, and Search Results
But if you don’t have the time to read these great guides or if you’re still not sure whether your headline is good or not, you can use the following tools. They will give a score to your headline and tell you right away if they’re awesome… or terrible.
CoSchedule Headline Analyzer
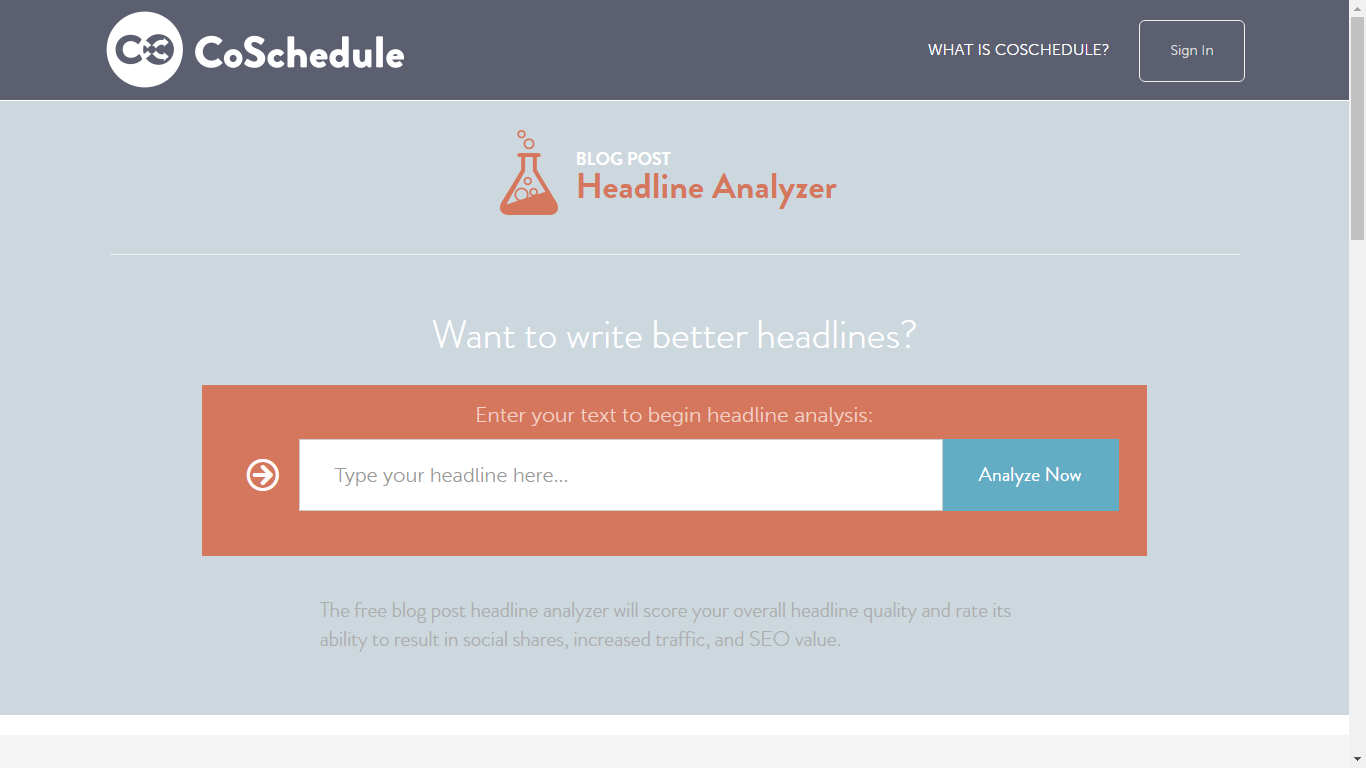
This is by far my most preferred headline analyzer. I use it every time I want to write a new post. I use it to test my headlines when I want to submit ideas for a guest post (since in this case, the blogger takes his decision mostly based on the headline). Sometimes I even include my headline score in the pitch.
Enter the headline and you’ll get a score between 0 and 100, though most of the time your score will be in the (60, 80) range. Anything above 70% is good enough.
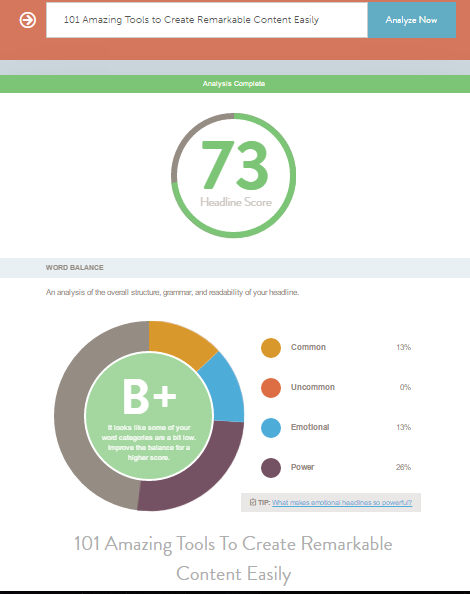
The score is based on:
- The word balance (common, uncommon, emotional and power words)
- The headline type (list posts, questions, generic, …)
- The length (too long is not good for SEO). It also shows you how it will look in Google or as an email subject line.
- Keywords
- Sentiment analysis
When I test the headline 101 Amazing Tools to Create Remarkable Content Easily, I get a score of 73%!
Emotional Marketing Value Headline Analyzer
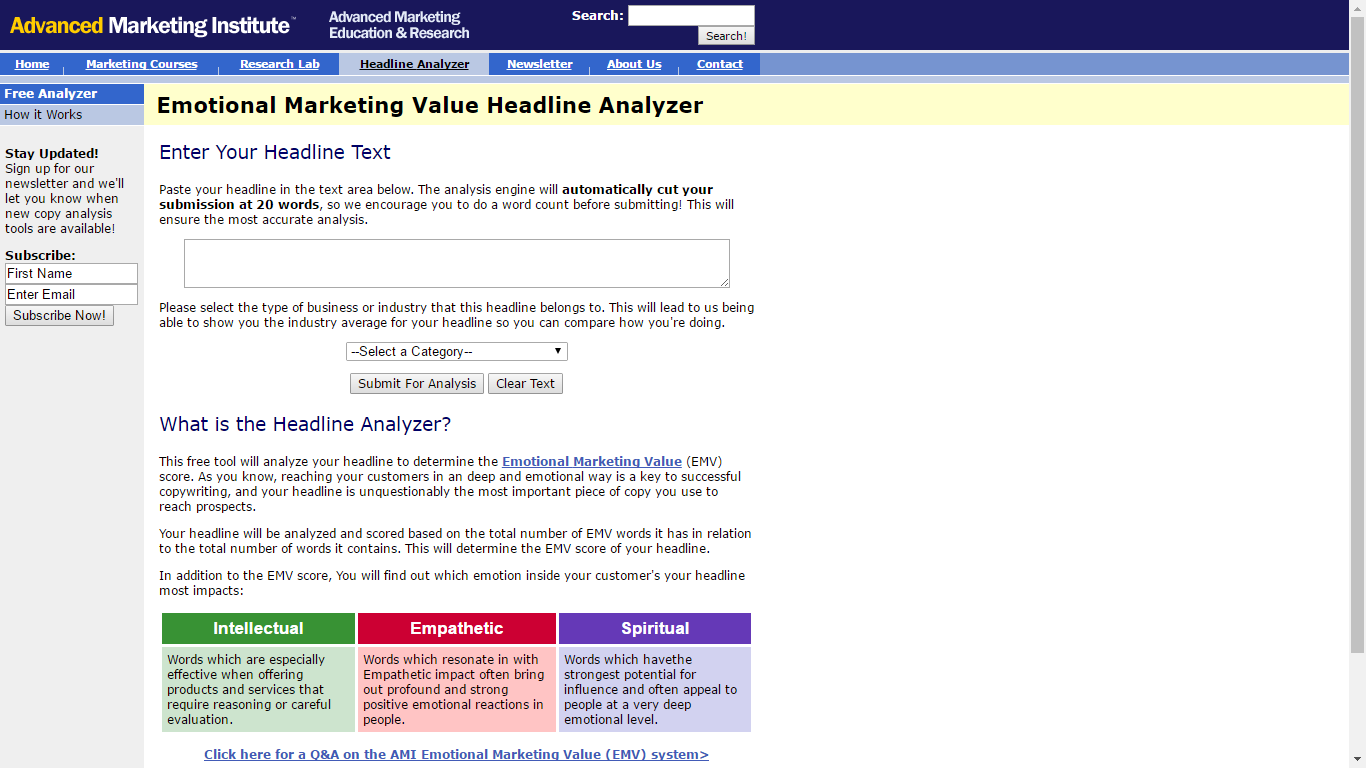
This headline analyzer from the Advanced Marketing Institute will give you a score based on the Emotional Marketing Value (EMV) of your headline. It tells how much emotion your headline communicate.
While we humans like to think we take decision based on reason, most of our actions are based on emotions, and that’s why emotional headlines work much better than rational headlines.
Enter your headline, pick a category (this doesn’t seem to have any impact on the score) and click Submit For Analysis.
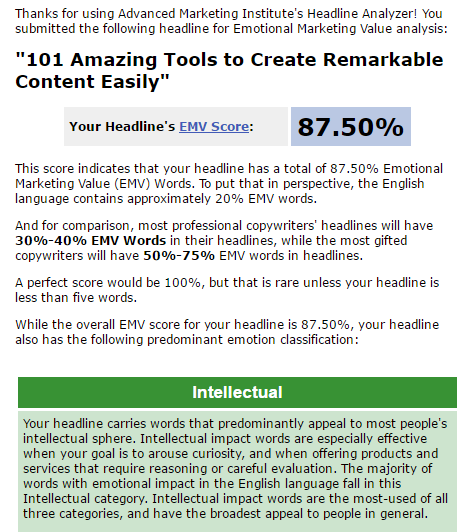
As you can see, my headline gets a 87.50% score. Fantastic! As they say, the most gifted copywriters will have 50%-75% EMV words in headlines. Maybe I should start a new copywriting career!
As with any automatic tool, you also still need to have a critical mind. Once you understand how the algorithm works, you can craft a headline that gets a 100% score but that doesn’t make sense at all. I found that the more you tweak your headline to add emotional words, the stranger it sounds.
Play with it, improve your score, but keep using your brain.
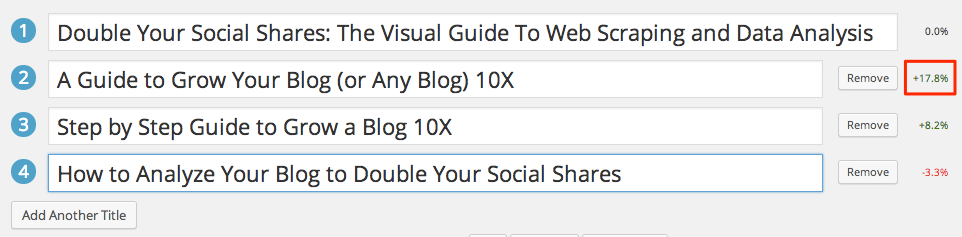
KingSumo Headlines
Instead of analyzing your headlines based on determined factors, the KingSumo Headlines plugin will determine the best headline based on the choices on your visitors.
Let me explain. In your WordPress article editor, you write several headlines you think are good but don’t know which is the best. The plugin will randomly show different headlines to your visitors and test which one works best.
As it gets more information, the algorithm will display the headline that gets you the most traffic, without you having to do anything.
I am not using this tool, as it is rather expensive at the stage of my business (starting at $99, I won’t be able to have a positive ROI), but if you’re looking for tweaking your headlines in a sophisticated way, this tool seems to be the right one.
Picture from https://kingsumo.com/apps/headlines/
Thrive Headline Optimizer
The Thrive Headline Optimizer is like the KingSumo Headlines plugin we just discussed.
After submitting several headlines to your post, it will analyze the click-through-rate, the time readers spend on the article and how much they’re scrolling in it, to determine what is the best headline.
After gathering enough information, the optimizer will show the winning headline to maximize traffic.
It is a bit less expensive than the KingSumo version, with a starting price of $67.
Title Experiments Free
Here is another plugin that will let you test different headlines and compare them over time to find what is the best one. After having accumulated enough data, it will show the winner to your readers, meaning you don’t have to manage it anymore once set up.
The plugin has the advantage of being free, compared to the two previous ones. It also has a pro version that will allow you to test different featured images (that’s useful if you write your headline on the featured image like I do) and provide detailed statistics for a price of 29.99$ per year.
It’s hard to tell which of the three plugins is the best, as they all more or less promise the same things, but might be using different technologies that provide different results.
Tools to Write The Best Outline
Once you have a good blog post idea and a compelling headline, the next step before starting your first draft is to draw a detailed outline of your future article.
The outline is an important step, as it will allow you:
- To write the first draft easily (by already knowing exactly what you need to write about).
- To avoid taking many different directions and waste time (you already have a structure of the article).
- To avoid iterating again and again (you have an initial plan and stick to it).
Here are top articles to help you learn how to write the best outlines:
- 10 Steps to Draft A Blog Outline in 10 Easy Minutes
- How to Write a Blog Post Outline: A Simple Formula to Follow
- How to Write an Outline: A Non-Writer’s Guide
Now, where are you supposed to write your outline? On a piece of paper? In Word? Or are there specific tools for this?
Yes there are, and here are the best you can find:
Evernote

While Evernote is not exactly an outlining tool, but it can still be used for it.
Here is how to use it:
- Create a Notebook called Blog post outlines. Notebooks in Evernote are like folders.
- For each new outline, create a new Note and fill it with your outline.
Evernote provides the basic editing tools for writing your outline and organizes them all at the same place:
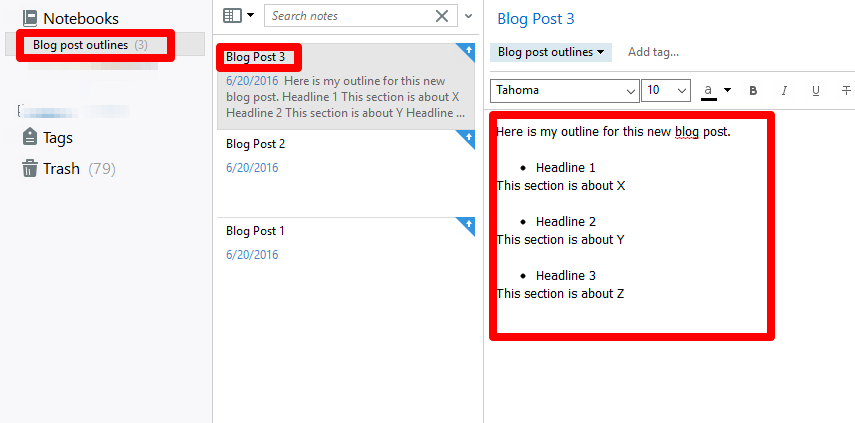
If all you need is a place to write your outlines, Evernote will do the job.
Now, if you need fancier outlining tools, keep reading.
OmniOutliner
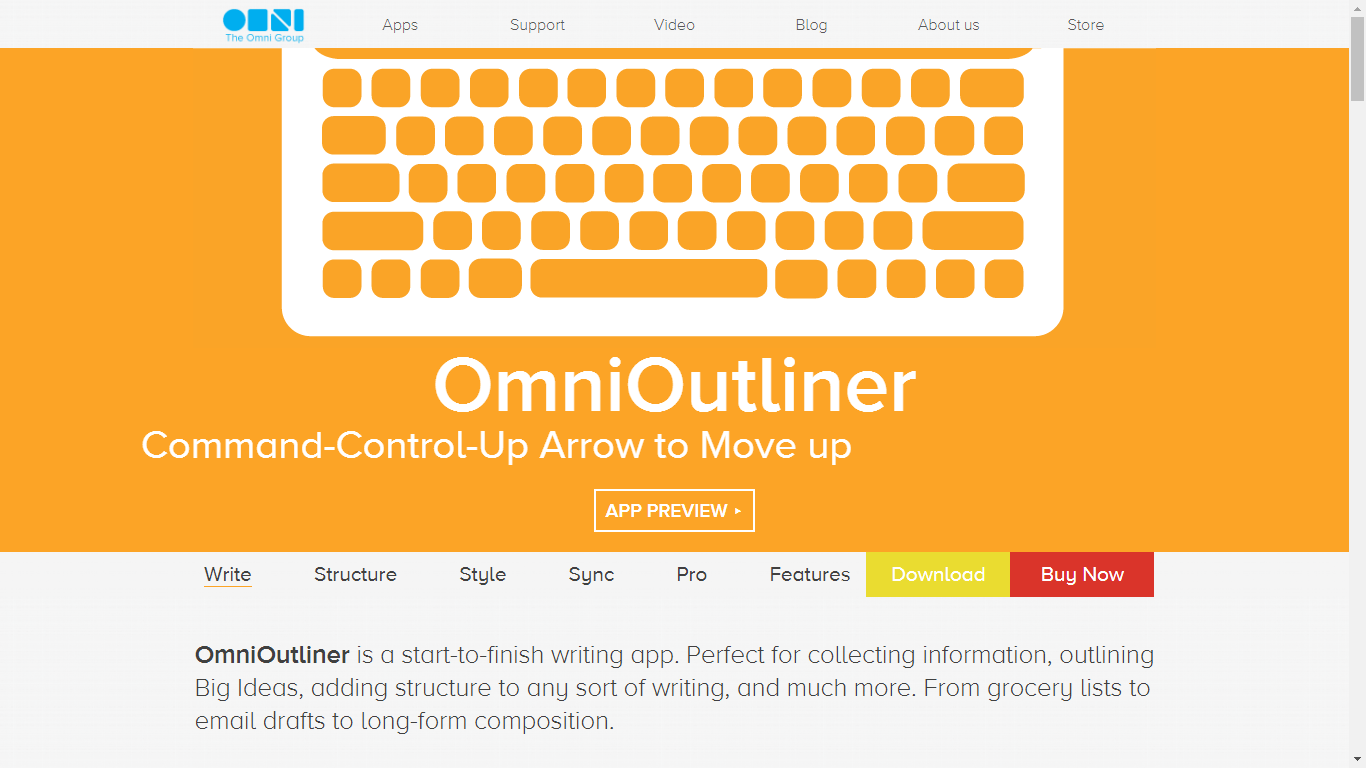
The OmniOutliner is only available for Mac users. This tool brings outlining to a new world with a bunch of incredible features. Here is a video showing how to use the app:
Introducing OmniOutliner 4 from Vimeo.
I feel that it’s even too powerful for outlining, but if you’re used to write long and detailed blog posts that look like mini-ebooks, it will be useful for you.
WorkFlowy
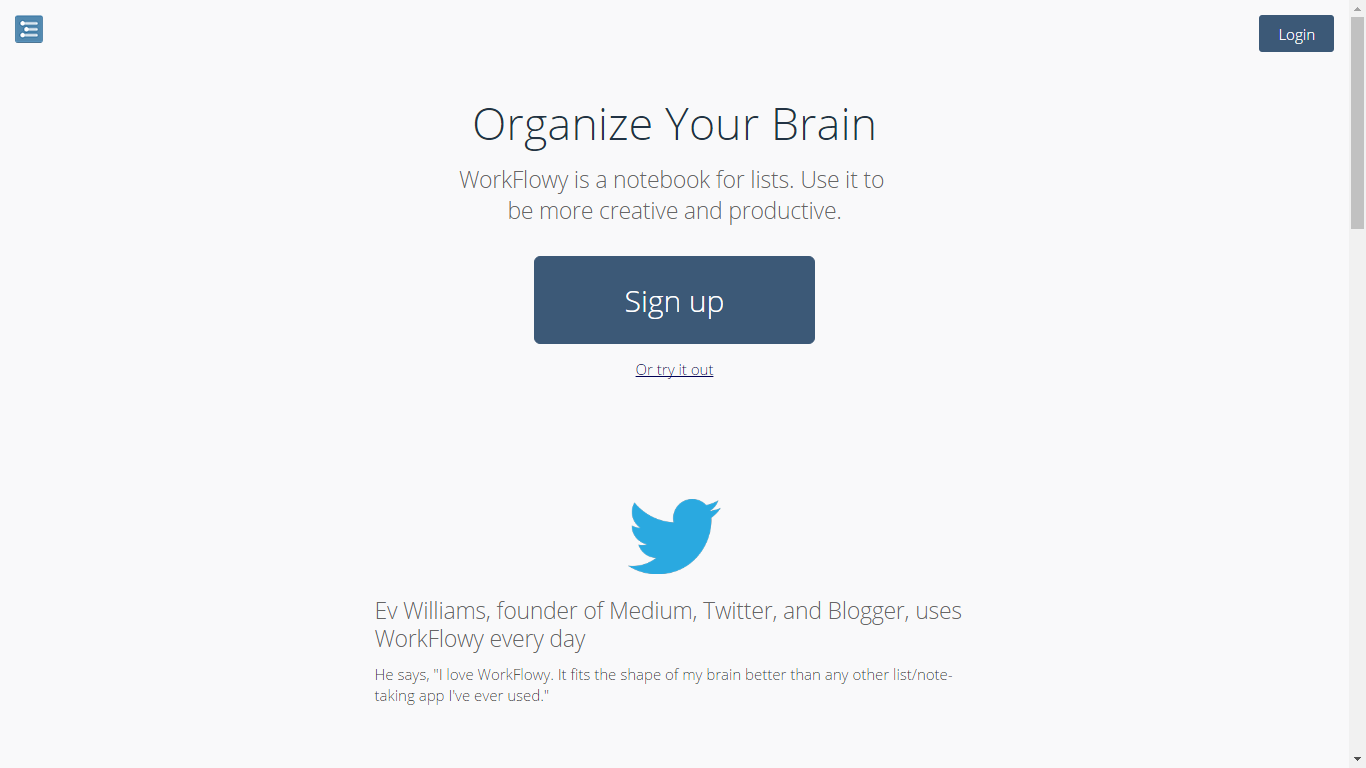
WorkFlowy is a lot simpler, and you don’t even need to create an account or download anything to try it.
While it’s intended to be used as a to-do list, you can use it to structure your blog post and take notes for each section or subsection.
The coolest features are the possibilities to move around the sections, fold and unfold them, and play with the indents. This helps to focus on creating the content and the structure without wasting too much time on formatting the text.
Scrivener
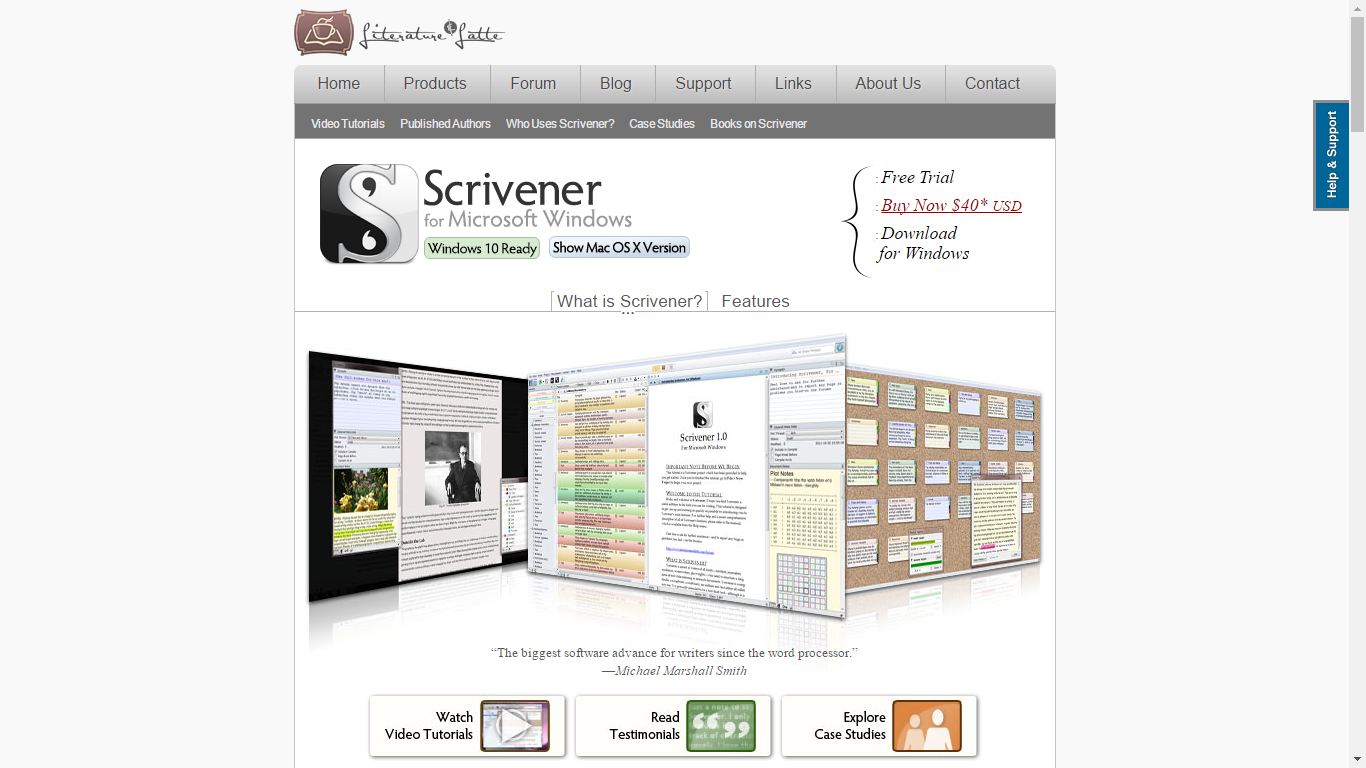
Scrivener is the ultimate software for writers. It is awesome for writing blog posts.
But in this section, we’re interested in what it can offer us to improve our outlines. Like many other outlining tools, you can write the structure similar with bullet points and then expand them by explaining what they contain.
What I like with Scrivener though is that you can zoom into your outline and know at what step you are in the creation of the article. Is this subsection already finished or still in progress? How many words have I already written for this part?
Instead of writing the outline as a step separated from the rest, Scrivener integrates it in your writing project.
Image from https://www.literatureandlatte.com
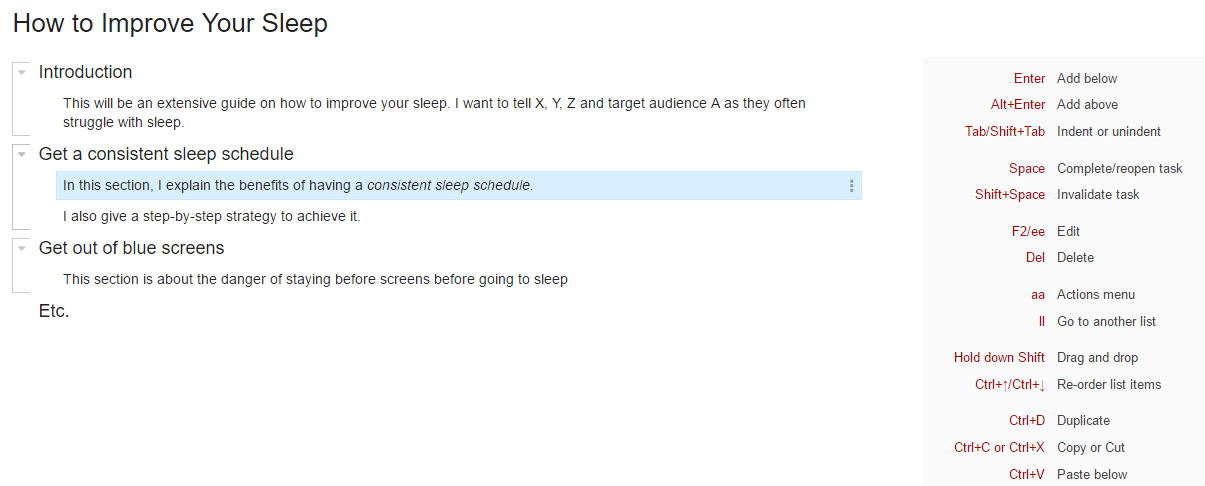
CheckVist
If you want a tool that lets you write without worrying about anything else, you will like CheckVist.
This tool focuses on having a LOT of keyboard shortcuts to help you focus on outlining only and not worry about anything. The shortcuts will help you write the outline at light speed.
They define this tool as the Online outliner for geeks as it’s intended for people who aren’t afraid of complex keyboard shortcuts or writing in Markdown. If that’s you, then give it a try. If not, try something more user-friendly.
Little Outliner

You don’t want a fancy outliner with tons of features?
If you’re a minimalist outliner, then Little Outliner is for you. Right when you arrive on the page, you get a prompt to start typing your outline.
Little Outliner has all the basics of an outliner:
- Indent and un-indent with Tab and Shift+Tab
- Write in Bold, Italic, or put links.
- Re-organize the bullet points. Fold and unfold entire sections.
If you just want a place to write a hierarchical outline and not bother with anything else, look no more.
Coggle
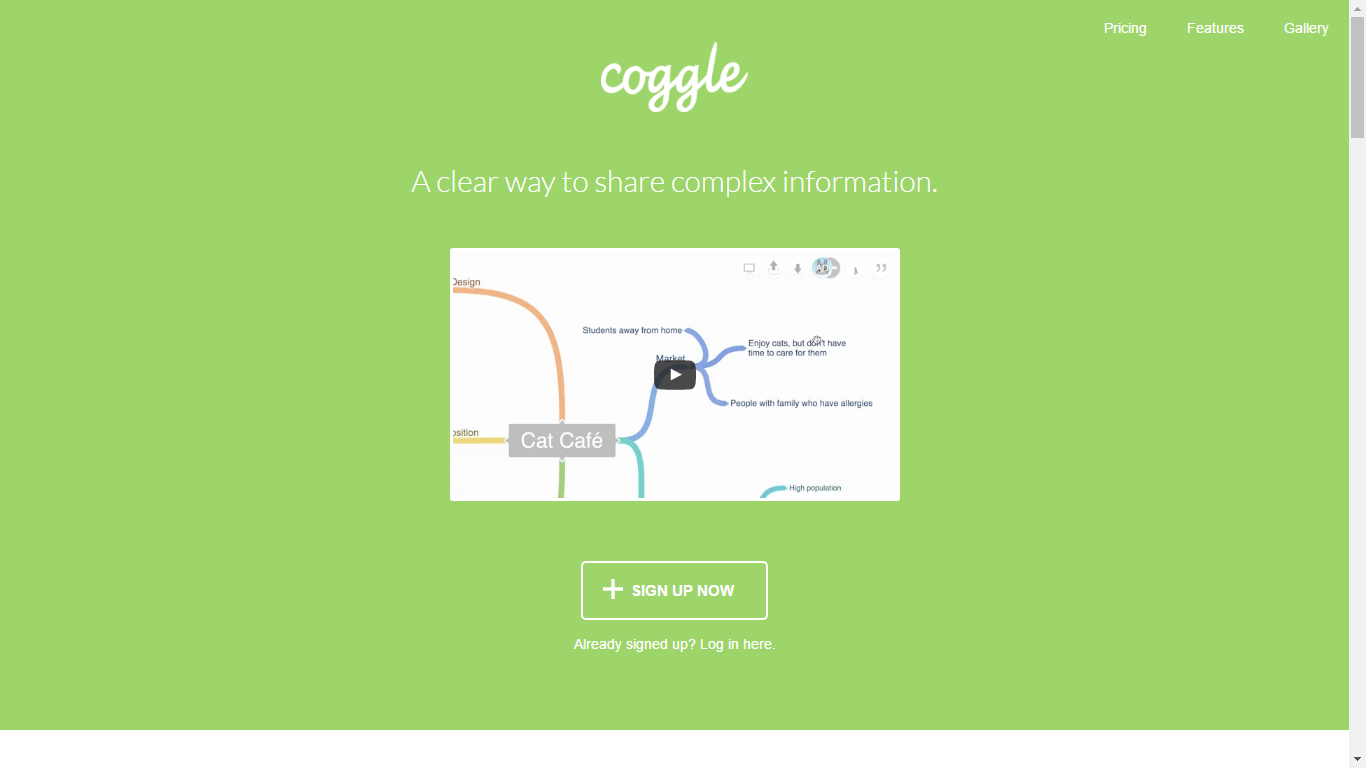
I’m not a huge fan of mind maps for outlining my blog posts, but I know some people only use that. In fact, just creating the example for the screenshot below showed me how powerful outlining with a mind map can be.
Every time you get a new idea, you can create a new branch and divide it in sub-branches to get more and more specific.
Now, there are tons of mindmapping tools out there, so why Coggle? Because:
- It’s free.
- It’s simple. We don’t need fancy features.
- It’s online. No need to download anything.
- It’s easy to sign up. You can link your Google account and be set up in 30 seconds.
Tools to Write Your Sh***y First Draft
So far you have:
- Found a compelling blog post idea with a good headline.
- Written a detailed outline.
What’s the next step? According to best-selling author Anne Lamott, it’s the sh**y first draft.
You just write. And later you will edit.
I won’t direct you to other articles to learn how to write your first draft, because really all you need to know is this:
- Follow the structure of your outline.
- Write everything you have in your head.
- Don’t worry about formatting, grammar mistakes, awkward phrasing or rambling. Don’t edit when writing the first draft. A good exercise is to prevent yourself from using the backspace key.
- You can only get better at it by getting practice.
Of course, there are tools to help you in this daunting task, but I must warn you: They won’t do the writing at your place!
Google Docs
Google Docs is the holy grail of the modern blogger.
It’s like a simplified online Microsoft Word with which you can collaborate with other people. I used to write all my blog articles in Google Docs, and I still do sometimes, like right now. Indeed, it’s a great collaboration tool, I can share it very easily with Sean and then he can directly add comments or edit the article if I give him the rights.
Markdown Pad
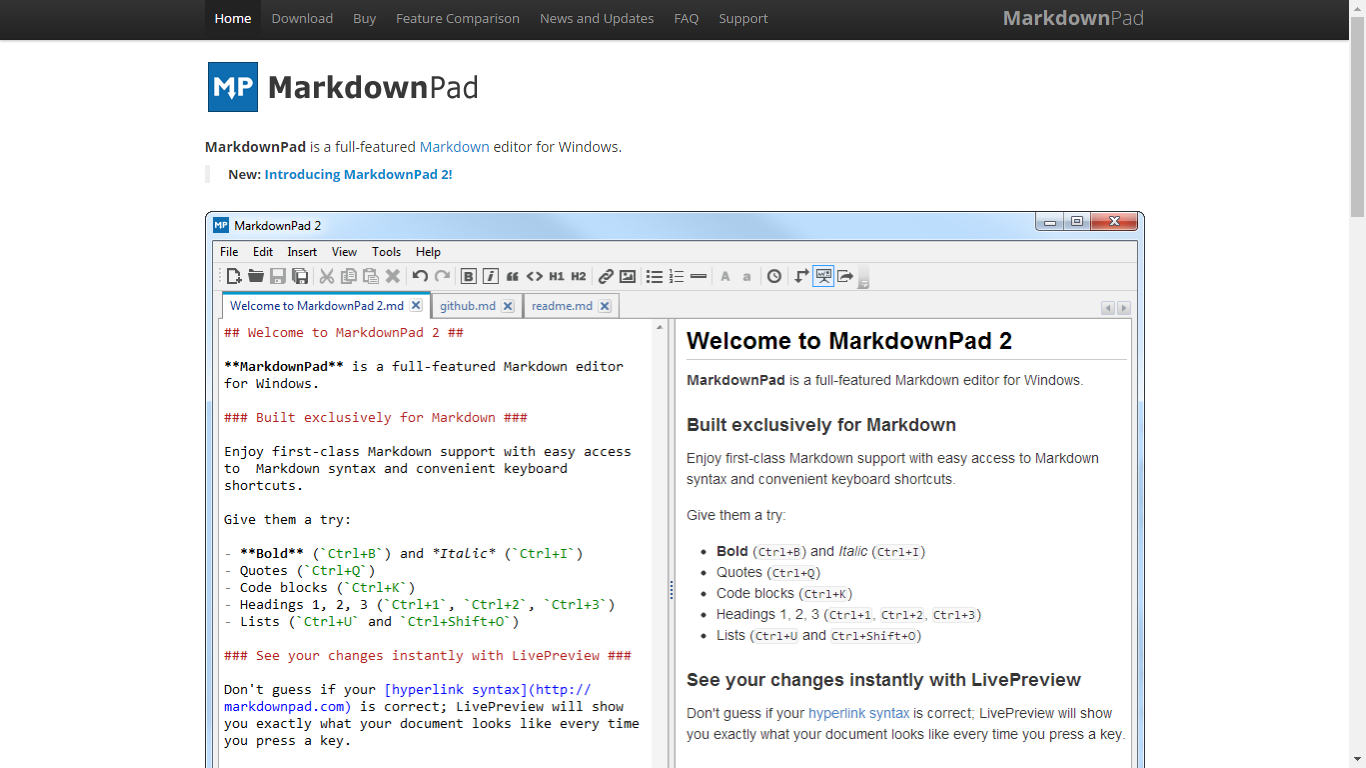
Markdown Pad 2 is where I write most of my articles nowadays (this is going to change though, as I discovered a lot of interesting tools by writing this article).
Markdown is a markup language that helps you write in HTML without knowing HTML. Instead, you have a set of rules to write the titles, to write in bold, or to make bullet points. Most of them are really intuitive, so there’s no steep learning curve.
Now, why should you bother to write this way when nowadays we have tools such as Google Docs that make all the formatting much easier?
Here’s why: I used to write in Google Docs, but then I would waste hours trying to copy/paste it in my WordPress editor. If you’ve tried it yourself, you know what I mean.
Now, by using the HTML provided by my markdown document, all I need is one copy/paste, and everything is already beautiful. I’m saving hours writing this way.
One important drawback is that I lose the collaborating possibility that Google Docs was offering.
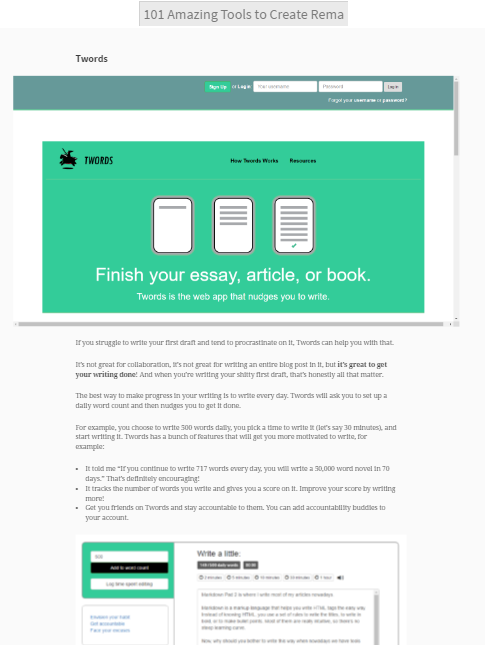
Twords
If you struggle to write your first draft and tend to procrastinate on it, Twords can help you with that.
It’s not great for collaboration, it’s not great for writing an entire blog post in it, but it’s great to get your writing done! And when you’re writing your sh***y first draft, that’s all that matter.
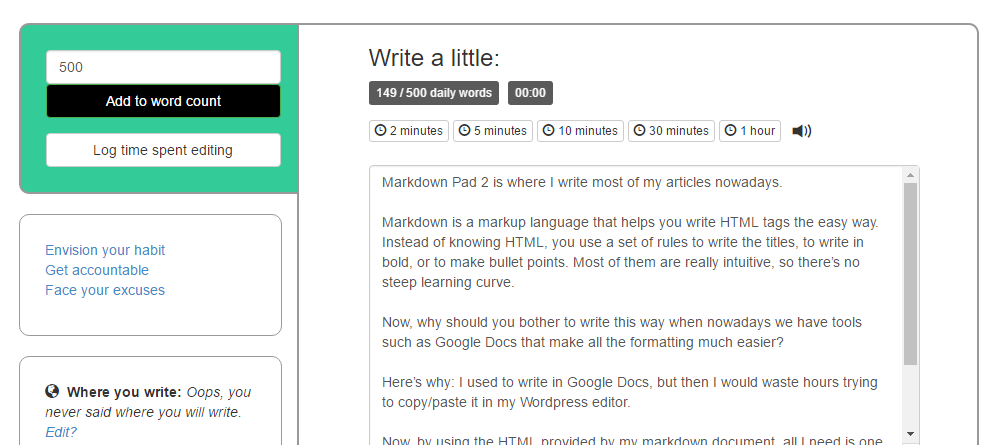
The best way to make progress in your writing is to write every day. Twords will ask you to set up a daily word count and then nudge you to get it done.
For example, you choose to write 500 words daily, you pick a time to write it (let’s say 30 minutes), and start writing it. Twords has a bunch of features that will get you more motivated to write, for example:
- It told me “If you continue to write 717 words every day, you will write a 50,000 word novel in 70 days.” That’s inspiring!
- It tracks the number of words you write and gives you a score on it. Improve your score by writing more!
- Get you friends on Twords and stay accountable to them. You can add accountability buddies to your account.
ZenPen
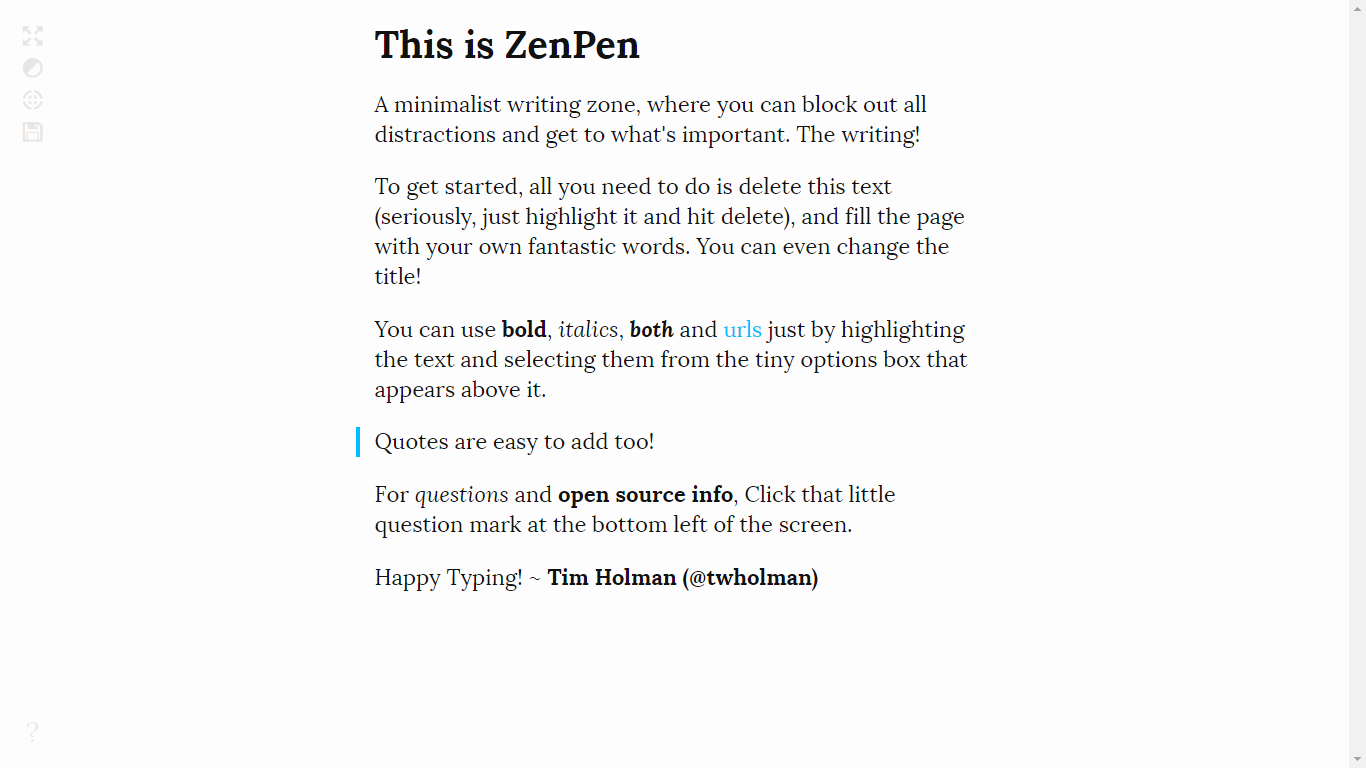
If you are struggling with distractions, ZenPen is for you. They define it as a minimalist writing zone, and that’s exactly what it is.
Simply sit down, get clear on what you want to write about, open ZenPen, toggle the Full Screen feature, and start writing.
You can then set a timer if you want to write for, say, 30 minutes, or set a words goal in the application. A progress bar on the right will tell you how close you get to your goal.
Calmly Writer
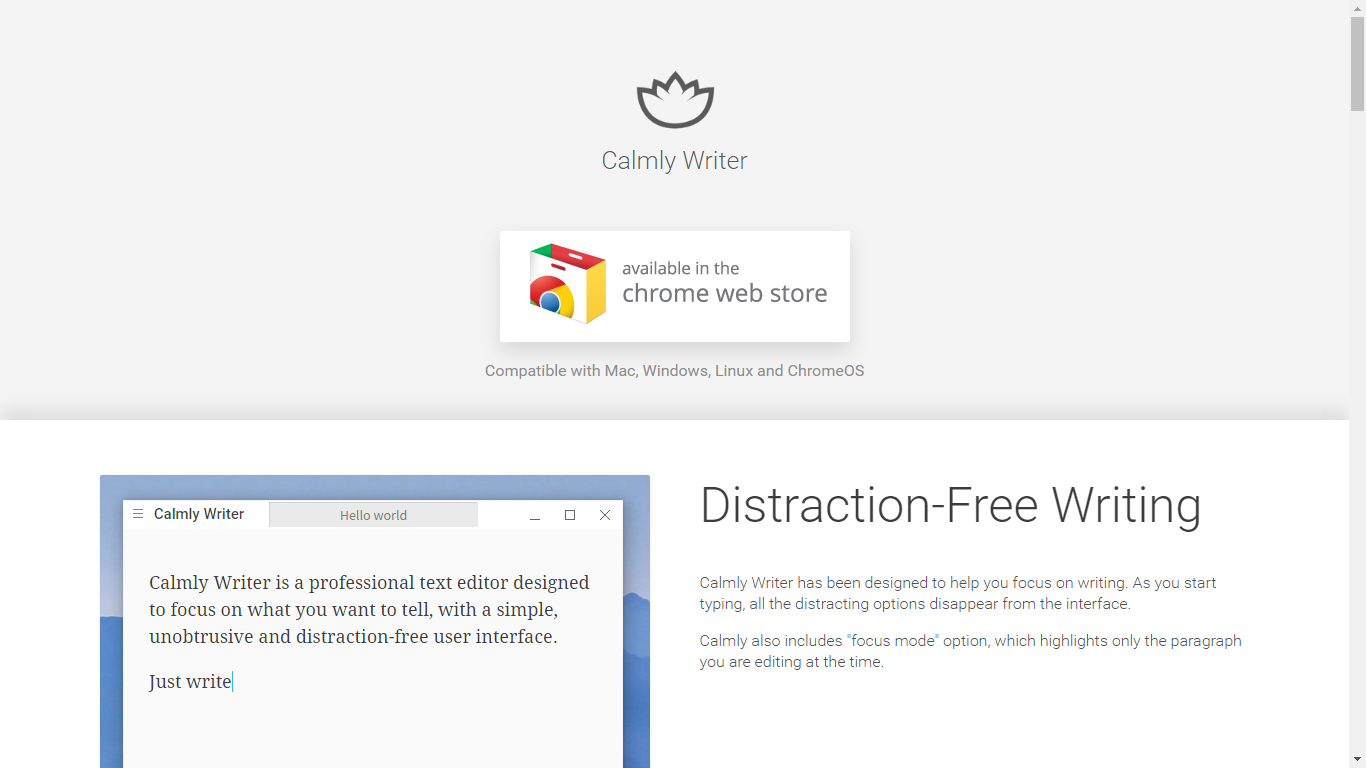
When I first looked at Calmly Writer, I thought “Well, it’s just another distraction-free writing tool, there’s no point to feature it as well since ZenPen does this job pretty well already”.
But then I looked closer. I tried it. And I fell in love. Here is why this app will probably become my next writing environment:
- Easy to use and distraction-free. You install it as a Chrome app.
- Possibility to use Markdown… or not! You can either click on a button or write the Markdown code.
- Very-easy-brainless integration of images. You just copy-paste it!
- Finally, the best feature for me: An HTML export so that you can directly copy/paste the html into the WordPress editor. For the pictures, it automatically gets the URL from where you fetched it.
Woah!
It also gets bonus points for being neat, responsive, offering backups, having a focus mode that highlights only the paragraph you’re working on (great for editing!), and many other nice features.
The app is free, but you’ve got to pay about $5 to get the top features of the app (like the backup or Markdown).
Typewrite
Have you ever written an article, then iterated on it, and kept iterating again and again… Only to want to come back at a previous version?
Most of the time, that’s not possible. All you’ve got is your current version and you can’t go back in the past.
If you’re this kind of writer who wants to save versions of your work as you make progress on it, then you may want to give Typewrite a try.
It also offers you a distraction-free environment, a possibility to collaborate with other people, to sync your articles on Dropbox, and also to type in Markdown!
Tools to Write in the Zone and Double Your Productivity
In the previous section, we saw a bunch of distraction-free writing environment. Why is it that most writing apps out there focus on this one feature?
The answer is: Because writing is hard.
Writing is so hard that you will find any excuse to not do it. When comes the time of your writing session, you suddenly realize that your apartment needs some cleaning and that you have the motivation to do it!
You will procrastinate on writing. If you’re not careful, you will waste hours social media, emails, or anything that is not writing. A common example is doing research for hours, thinking you’re being productive, while all you’re doing is actually postponing the writing.
It doesn’t have to be this way. A lot of tools can help you to get the writing done and resist the procrastination.
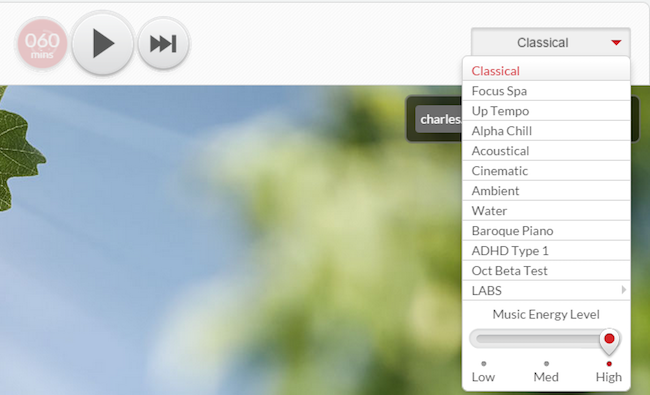
focus@will
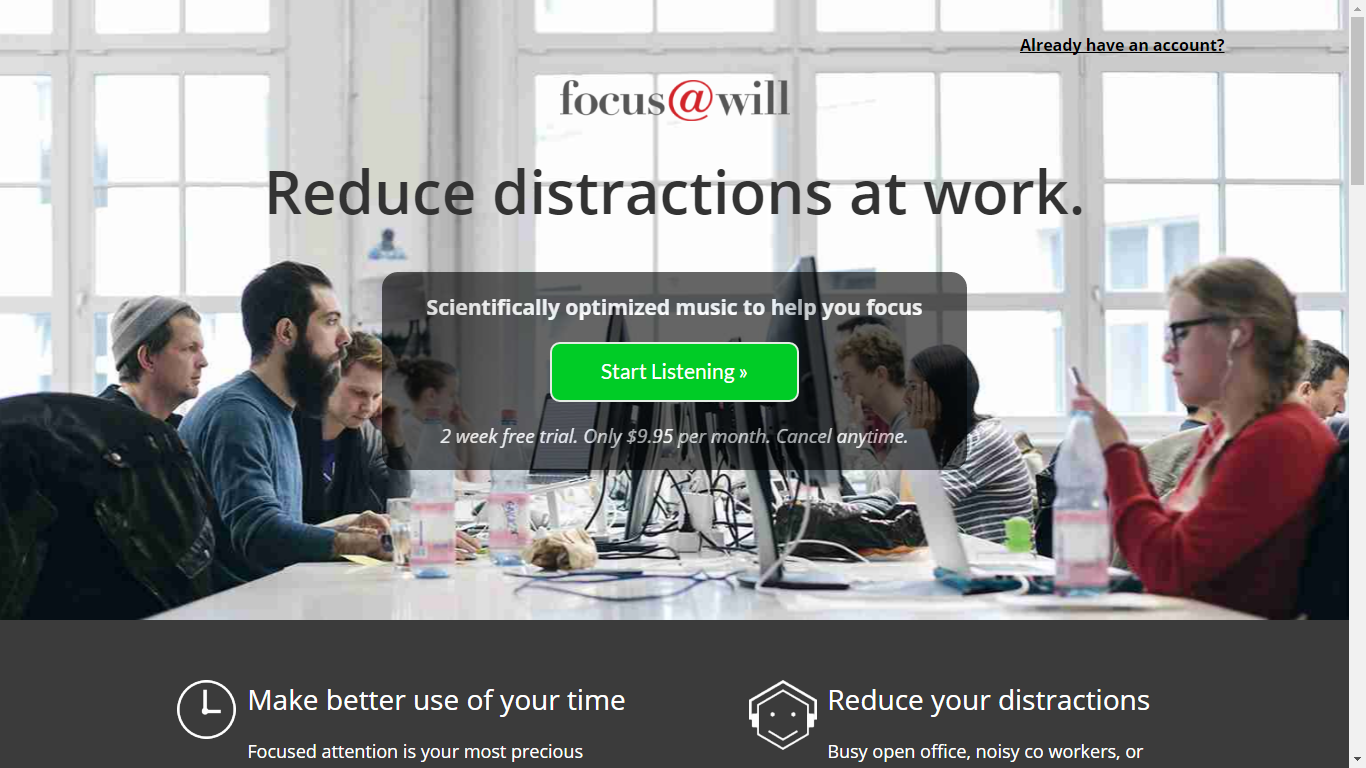
Focus@will takes listening to music while working to the next level.
You may like to listen to your preferred music while writing, and this may be a good idea… or not! The issue with most music is that they’re distracting, especially when there are lyrics.
Focus@will have selected music that will enhance your focus instead of distract you.
Basically, you set up a timer, choose your type of music, and you’re set up. At the end of the time, “Ting!”. You’re done.
I have used Focus@will for more than a year and it has always helped me get in the zone quite easily.
Rainy Mood

Some people find that listening to nature music, especially rain, helps increase their focus. I’m definitely part of these people, and found that Rainy Mood does this job well. All you have to do is launch the website, and that’s it.
While I like with listening to the rain is that it’s a bit similar to white noise. It isolates you from external noise, hence creating a kind of sensoriel bubble that will help you get in the zone.
Cold Turkey
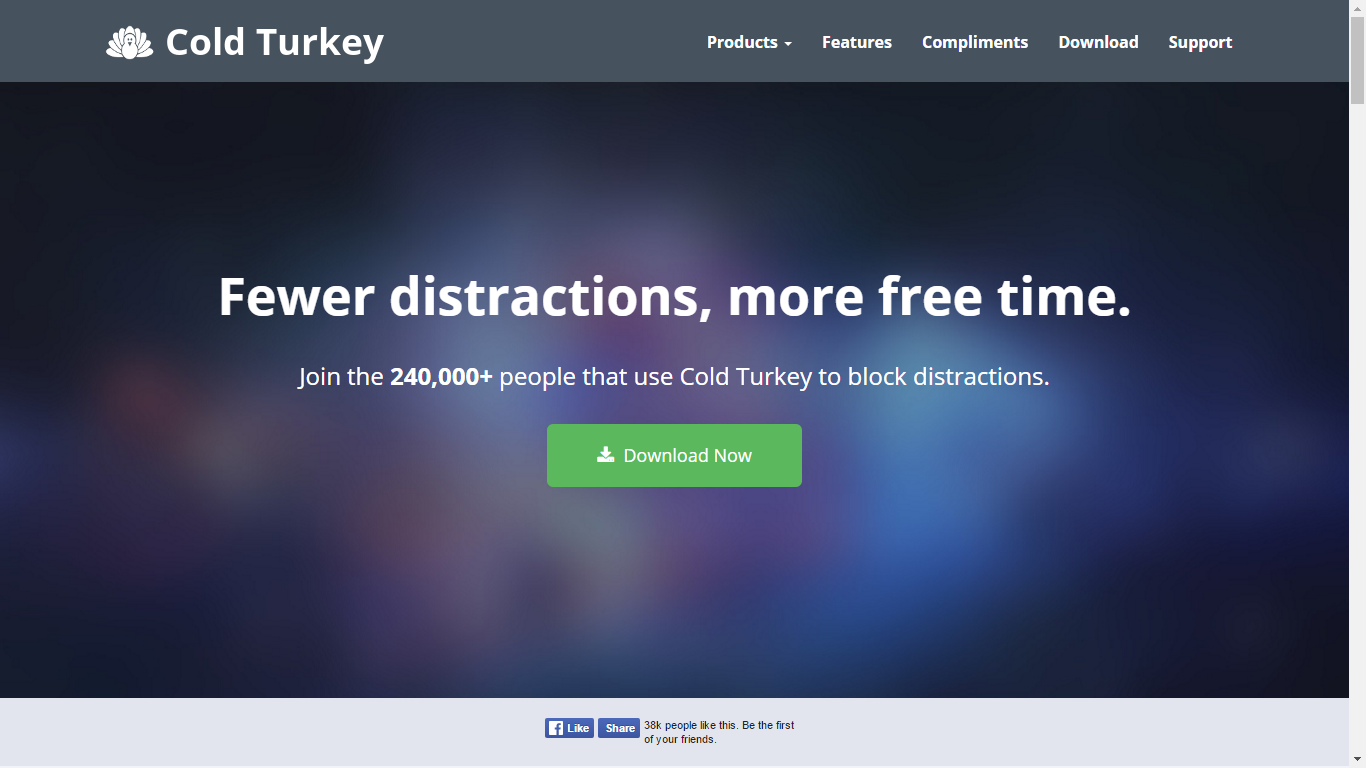
ColdTurkey is a long time favorite of mine. For a while, when I was working full-time from home, I was using it almost religiously. This was my savior from the unlimited world of distractions that is internet.
This tool will allow you to block all the distractions on your computer: Social media, emails, games, webchats, etc. You name it!
You simply make a list of websites and programs that distract you during your writing, and then tells ColdTurkey to block them during a specific time frame.
For example, after I made my list, I told the app to block all my distractions every weekday from 6 am to 9 am, which is the timeframe when I’m working on my business:
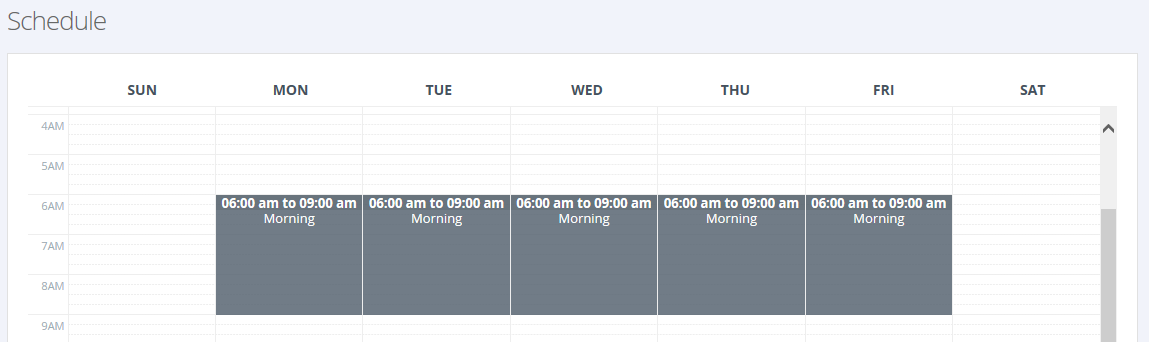
If you find yourself spending too much time on Facebook instead of doing your writing, consider doing the same thing. There is no shame in admitting that resisting to distractions is hard.
There is a free version but it won’t allow you to block programs on your computer nor schedule specific times like I do. The paid version is a one-time $19 payment.
Cold Turkey Writer
Nope, Cold Turkey Writer is not the same app!
It is a writing app with a special feature: It won’t let you quit until you’re done.
You set up a number of words to write or a duration. Until the goal is achieved, you can’t quit the app. You can’t anything else but write until you’re done.
You could do with the free version, but the paid version (a one-time $10 payment) offers a setting that I particularly like: It blocks the backspace and delete keys. This is just perfect for writing your first draft! Too many people tend to edit and write at the same time, resulting in wasting a lot of time iterating again and again on the same things.
Tomato Timer
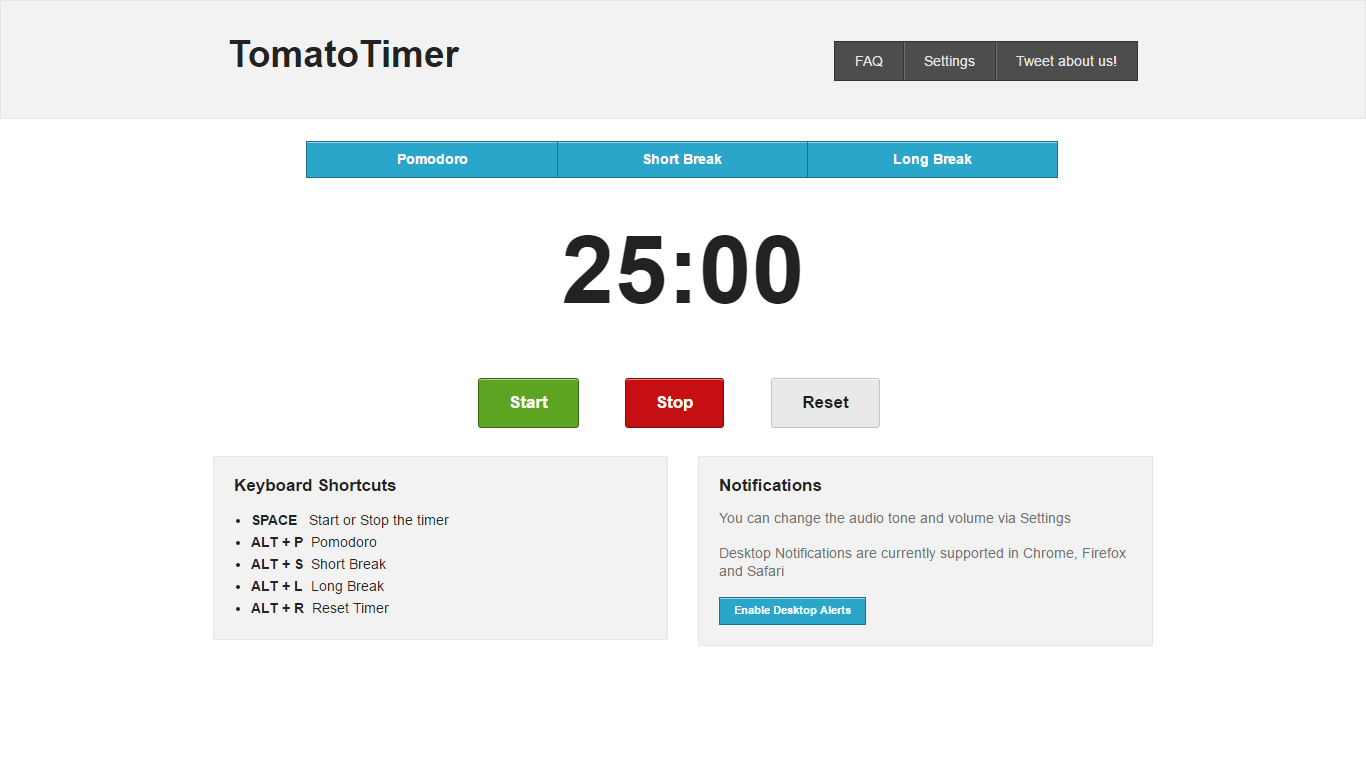
You certainly have heard about the Pomodoro Technique. This time management technique invented by Francesco Cirillo works like that:
- You set up the timer for 25 minutes.
- You work until the timer expires.
- You take a short break of 5 minutes.
- Repeat steps 1 to 3.
One iteration of the process is called One Pomodoro, and every 4 pomodoros you take a long break (at least 10 minutes).
The major benefit of this technique is to reduce procrastination. Instead of thinking of the big daunting task you need to do, all you do is a click to start the timer, and now you’ve got to write for just 25 minutes, which sounds really easy.
Since writing is hard and something we tend to procrastinate on, the Pomodoro technique will help you get started with writing. That the hardest part is always getting started. Once you’re in a flow, it’s easy to keep going.
Tools to Make Extensive and Insightful Research
Nowadays, people want to back up their blog posts with as much research and data as possible.
I don’t always agree with this, as I found that many blog posts get their value simply from you sharing your personal experience. This way, by making people relate to your story, you inspire them to take action and change their lives. Not much research needed in this case.
That’s what matters in the end: Make people to take action. It’s not about feeding them with more information.
In this case, research should only be made to improve your current draft, not to change it or replace your personal experiences by studies and other facts.
But for some articles, like this one actually, you need to do a ton of research before writing the first word. For example, before starting to write this article, I went on an Internet journey to find as many tools as possible. Then I tried them, I discarded some and selected others.
So how to do this kind of research in an efficient and insightful way?
- This Is The Marketing Research Process That Will Take Your Content To The Next Level
- How We Research: A Look Inside the Buffer Blog Process
- How I write research-based posts
Here are some tools that will help you in this daunting and never-ending task.
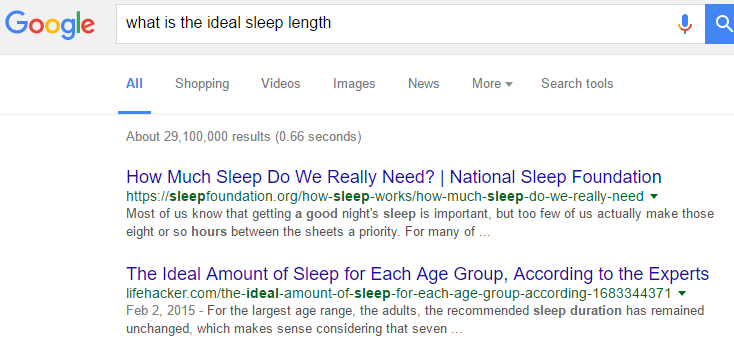
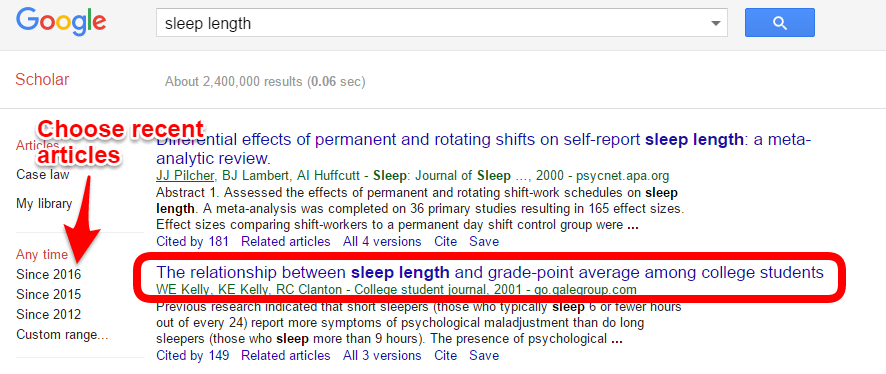
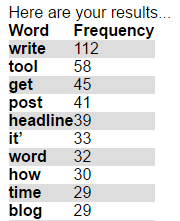
Of course… Google!
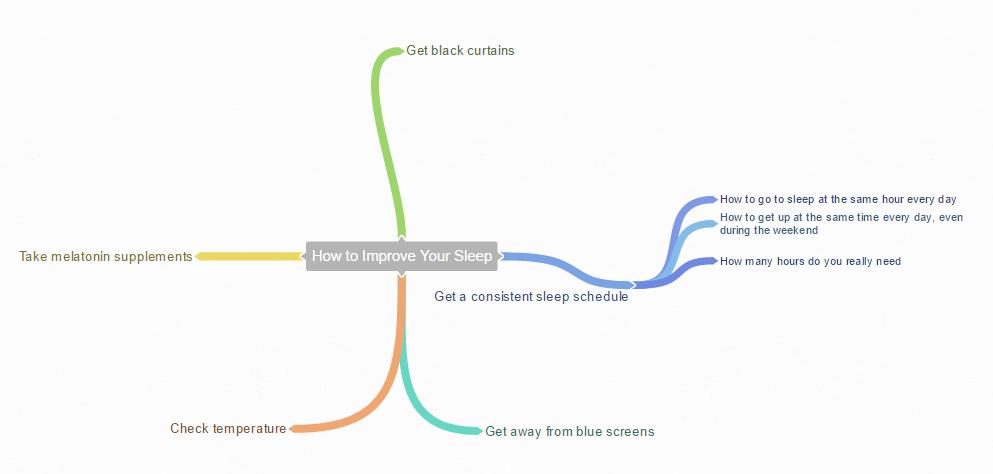
But it’s not just about typing keywords. Here are some tips that will help you get more relevant results. Let’s say my research revolves around sleep length.
- Add keywords
- Sleep length statistics
- Sleep length data
- Sleep length science
- Sleep length research
- Etc.
- Research on a website
Adding site:websitename.com will make your research results focused on only the website that you chose.
For example, site:www.huffingtonpost.com sleep length will allow you to get search results only from the Huffington Post website.
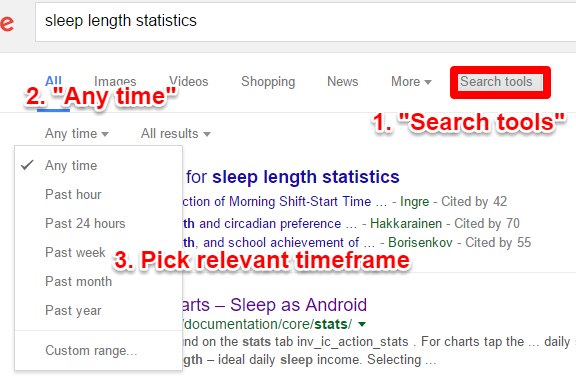
- Recent research
Use the Search tools to only get recent results. Following the screenshot below, here are the steps:
- Click Search tools
- Click Any time
- Choose the relevant timeframe.
- Ask questions
Before doing research, you should write down all the questions you have. Sometimes, the most naive approach of simply writing down the questions to Google works very well.
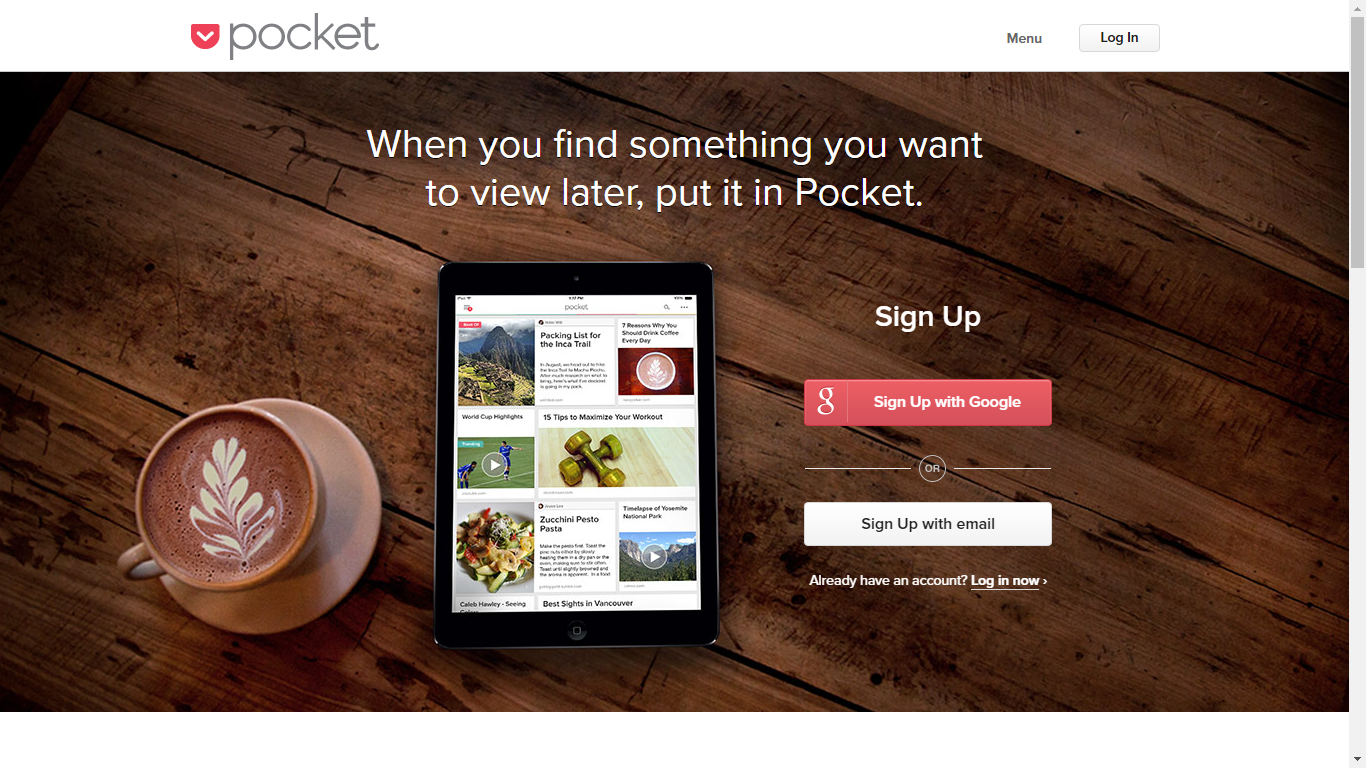
Have you ever stumble upon an article and thought “Woah! That’s exactly what I need for my next blog post!”, but you’re in the kitchen, preparing a meal for your family, simply browsing your phone, and you can’t take the time to read the whole article right now.
So you take a mental note, hope it won’t disappear, and move on with your life.
The next morning, you sit before your computer, ready to write your blog post, and you try to remember how you found this article the previous… but your mind goes blank.
Damn!
No need for such frustration anymore. Use Pocket and simply save all these articles in one place: In your Pocket.
How does it work?
- You subscribe to the service (it’s free).
- You get the extension for your browser (they tell you right away how to do it).
- You also install it on your phone (they also told me how to do it, it was 1 click away, so I clicked)
- Every time you stumble upon an article but don’t have time to read it, Pocket it!
Easy!
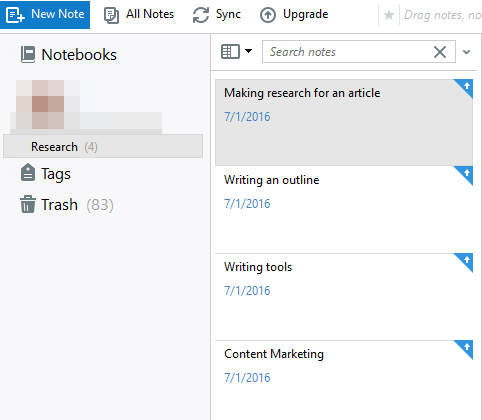
Evernote
Yes, we already talked about Evernote for outlining, but what was once a simple note-taking app has now become powerful.
I find that Evernote is the perfect research vault for your blog posts.
First, there is a feature similar to Pocket and it’s called the Evernote Web Clipper. It will help you save your articles for later.
But you can also use it for research purposes. First, create a Notebook called Research. Then, for each topic relevant to your blog, create a new note. Finally, every time you read something interesting about a topic, you can add it in your note, with a link to your source.
This way, when you need some scientific facts or data about a topic, you can go directly to your Evernote notebook and directly find everything you need.
Google Scholar
Google Scholar is the Google for scientific papers. Every field is subject to scientific research, whether you’re in marketing, fitness, personal finances or travel. Some fields will be more relevant than others though.
For example, if you write about travel hacking, this won’t be useful at all. But if you write about sleep, this will be a goldmine of information.
Tools to Edit and Transform Your First Draft
You should now already have your first draft, and thanks to this list of tools, you could find the time and focus to sit and write something.
This something isn’t good enough yet. It’s just your first draft, it’s just words that barely make sense together and that need some editing.
There are a lot of wonderful tools that will help you get from a sh***y first draft to a compelling new version your readers won’t stop reading.
Let’s get started!
Hemingway Editor
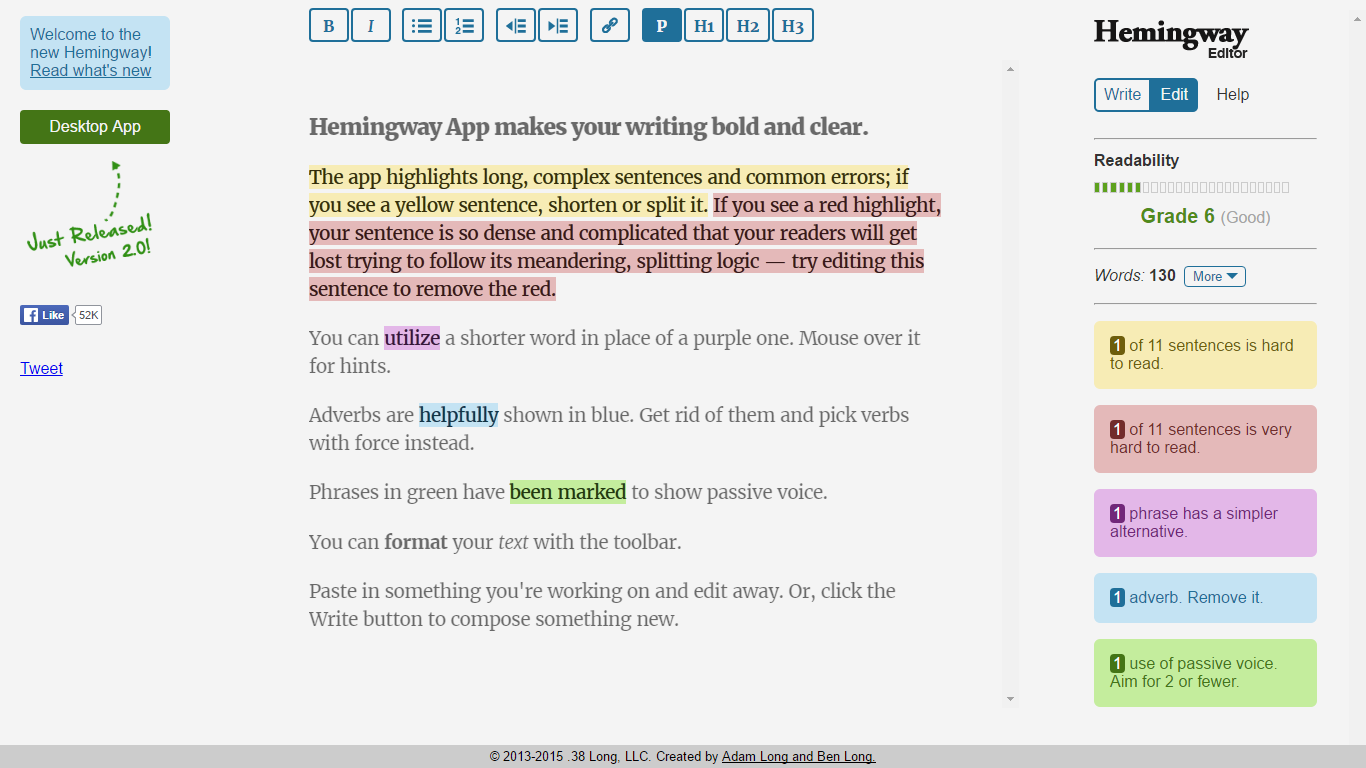
The Hemingway Editor is also a writing app, but really you don’t get any benefit from writing directly in it. It’s better to copy paste what you’ve been writing so far to try to improve it on the go.
This app will tell you:
- The readability of your writing: It tends to tell me that sixth Graders can read my stuff, which is a good thing as it means my writing is very readable. You don’t need to write in a complex way on the internet.
- Which sentences are hard (or very hard) to read. You may want to cut them in two or three parts.
- When you use adverbs. Adverbs brings complexity while you could probably replace them by a better verb that means exactly what you mean.
- When you use passive voice. You should avoid it in some cases as it will prevent you from making the emphasis on the right subject.
Simply go through your post and make minor edits here and there. If you’re like me, you’ll find a bunch of really, very and just that you can easily get rid of.
Grammarly
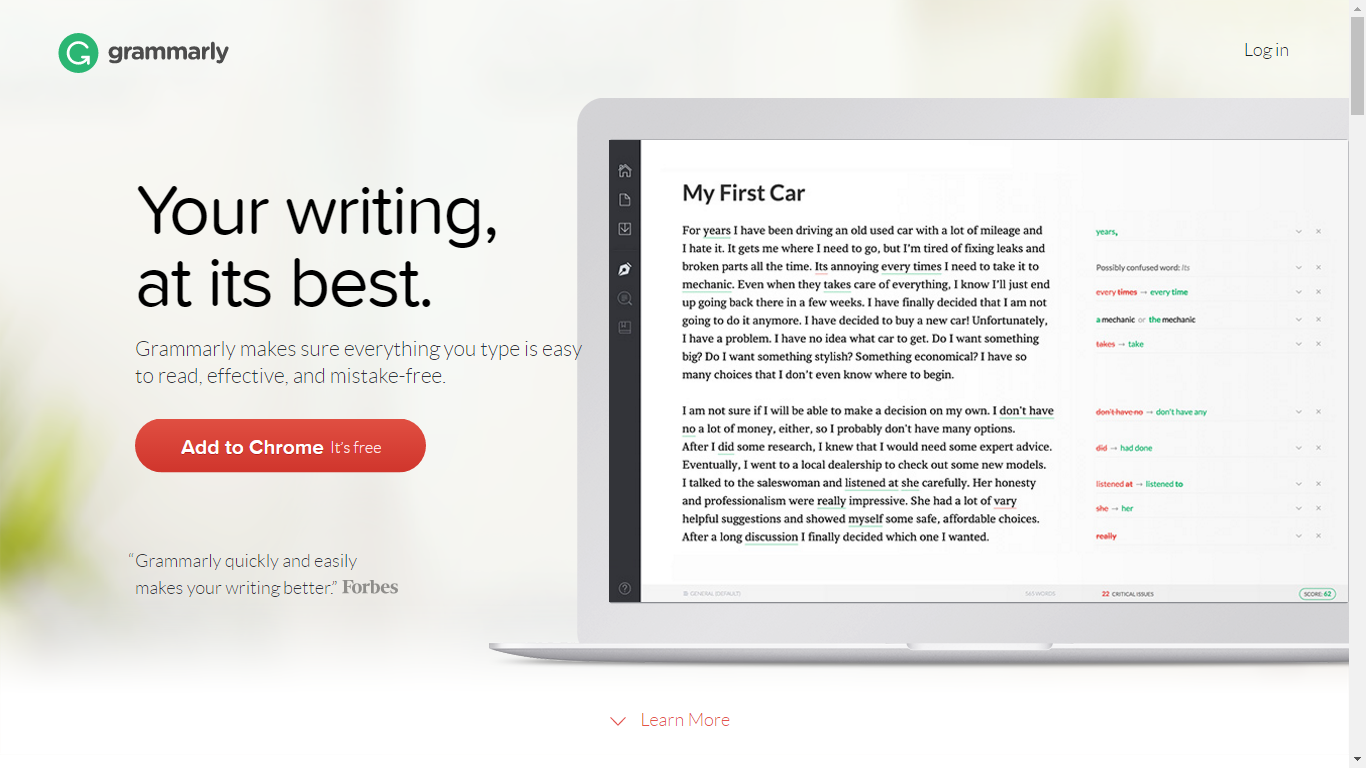
Grammarly is a grammar checker that propose you a free version or a paid version.
You can also install the Chrome plugin, so that everywhere you’ll be writing it will check grammar for you.
Otherwise, you can simply copy/paste your post in there and it will spot all your mistakes. As a non-native, I find this incredibly useful since I still make a lot of mistakes, sometimes as simple as this one:

For you English-speaking people, “news” is singular and I tend to forget it.
With the Premium paid version, Grammarly will also help you improve your post by spotting wrong word choices, wordiness, passive voice use, lack of clarity, etc.
Thesaurus
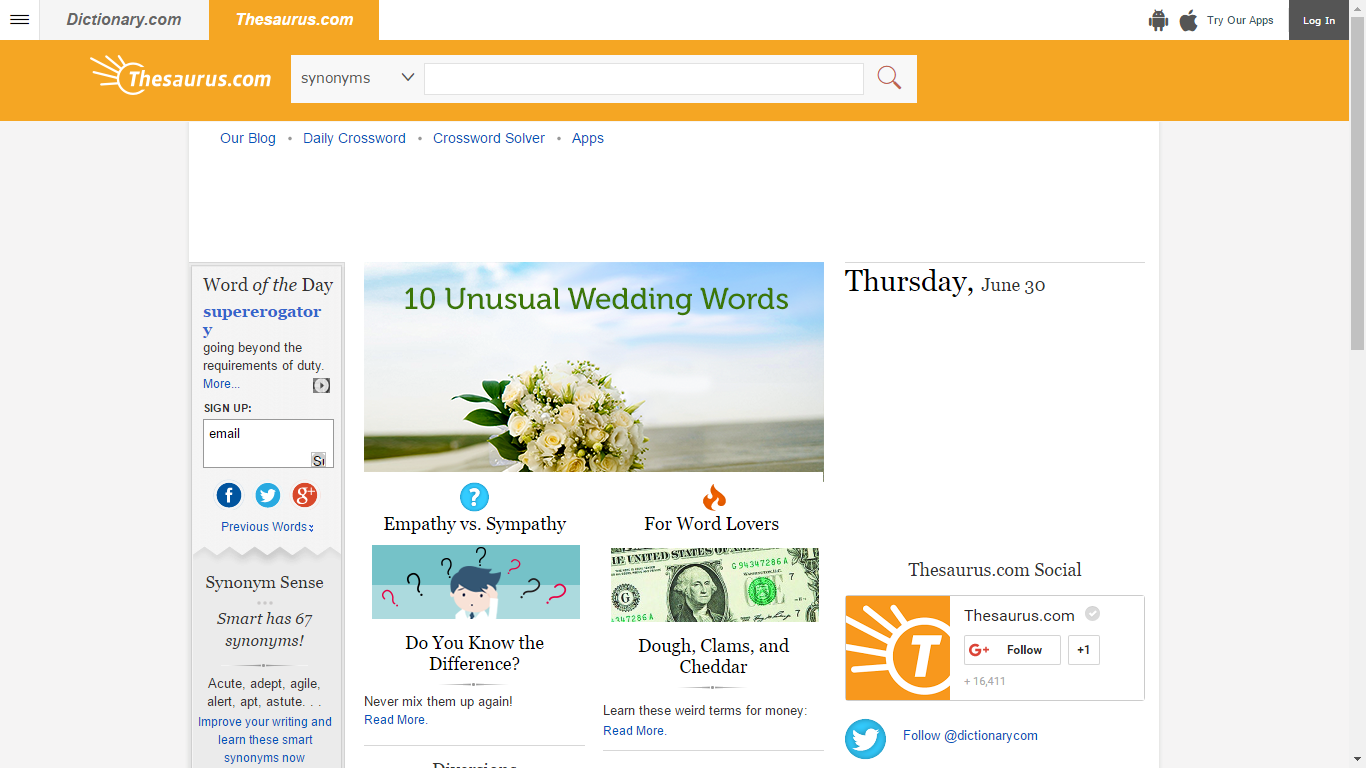
Has it already happened to you that you’re looking for a word but can’t grasp it? It’s frustrating right?
Or sometimes you just want to find alternatives to avoid repeating the same word over and over.
Then Thesaurus will help you a lot. Simply enter a word close to what you mean and it will give you:
- A list of synonyms.
- A list of antonyms.
- A list of related words with their synonyms.

TwinWord Writer
Do you sometimes get stuck on a word? You know the word, you know exactly what you mean, but it’s empty in your head. How frustrating!
Well, the TwinWord Writer will remove your frustration. If you’re hesitating on a word, it will make suggestions to help you find just the right word. It’s also great for editing, as every time you highlight a word, it will propose you a bunch of alternatives.
This can be a great tool for non-native English speakers who struggle to have a rich vocabulary and tend to write like 6th graders (yes I may talk about how I feel about my writing).
While this tool could be seen as a writing environment, I chose to feature it here as an editing tool for its WordPress plugin. Once installed, you will be able to improve your writing thanks to the word alternatives it suggests to you, but it will also give you some cool stats on your article. See for example:
After the Deadline
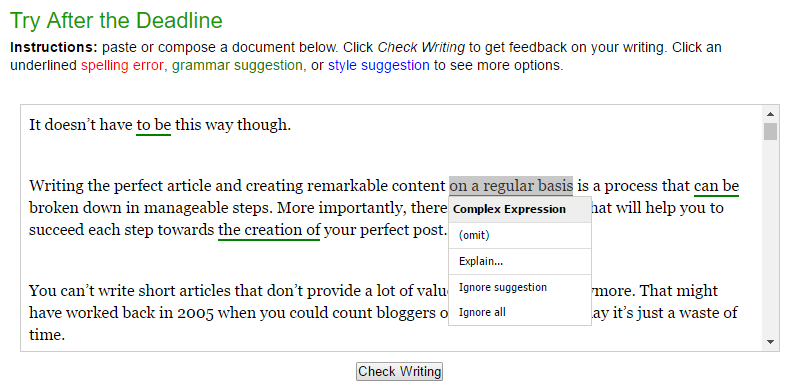
Similar to Grammarly, After the Deadline will check spelling and grammar mistakes, but will also spot the use of passive voice, complex expressions, etc.
Again, you can simply copy/paste your post in there to immediately get started. Every time it spots a way to improve your article, it will give you suggestions (for example to completely omit the expression), explain you why, and also give you the option to ignore this kind of recommendation all together.
Word Counter
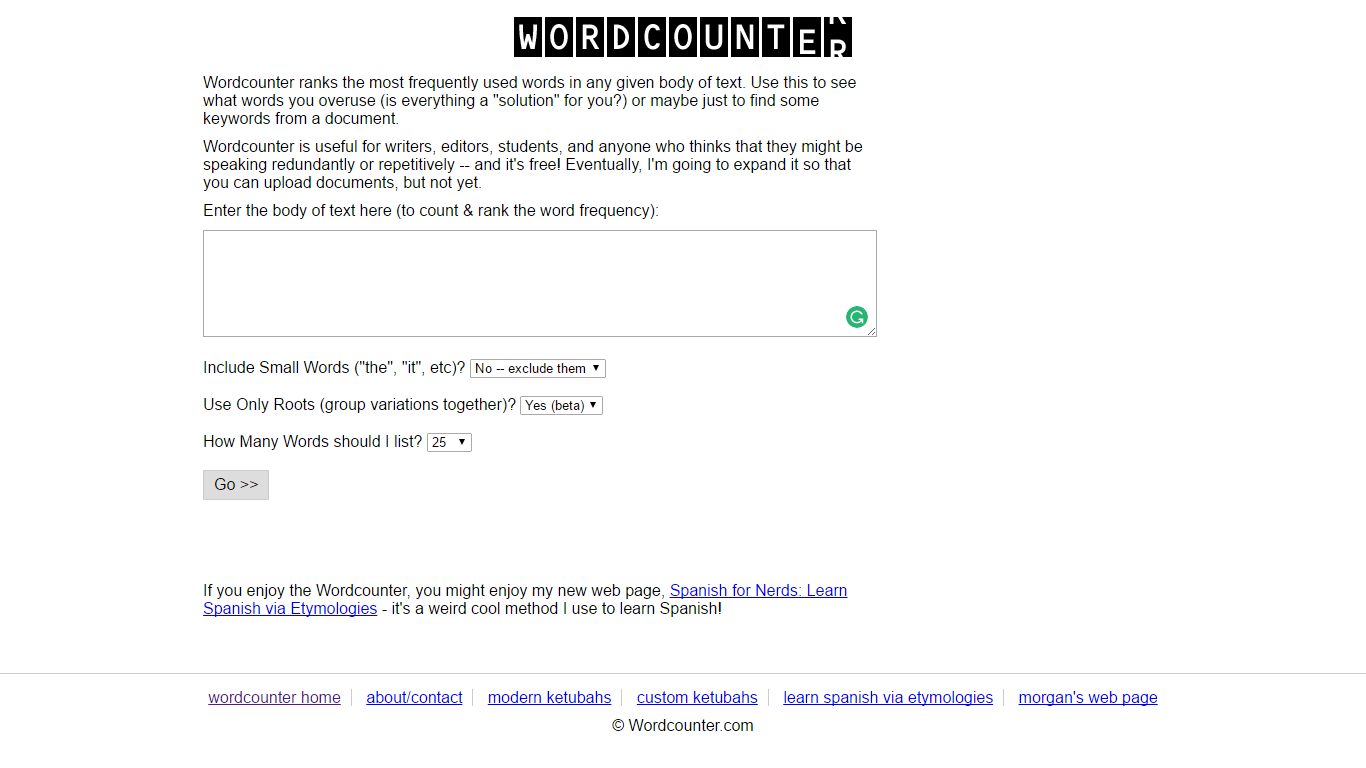
Almost all writing platforms out there will tell you how many words there are in your article.
But that’s not what WordCounter is about. This tool will rank the most frequently used words of your post.
It can be useful if you have a tendency to always use the same words again and again without noticing it (but your readers will notice and get tired of it!). It can also help identify a keyword that you could focus on for SEO purposes.
If I copy/paste this article into the tool, here is what I get:
Clearly, the keyword I would focus on for SEO would be writing tools, which is not a surprise.
Now I notice that I might be an over-user of the word get. There are certainly many opportunities where I could replace it with a better verb that will improve the readability of my writing.
Tools to Illustrate Your Post and Make it Attractive
We’re almost done!
You’ve written a detailed outline, then expanded it into a first draft that you edited with the help of some insightful research.
It’s almost time to publish your article, but there are a few more details to set up. I usually add the pictures and screenshots right at the end, so that I can focus only on the writing until it’s done. You also need a featured image for your post!
Let’s see what internet tools can do for you.
iStockPhoto
How much time does it take you to find a good featured image for your posts?
It rarely takes me more than 5 minutes, thanks to iStockPhoto. I write some keywords related to my articles, select the Essentials category (for cheaper stock photos) and find something good enough very quickly.
Now, it is expensive. It will cost you between $7 to $9 per picture, while it’s true you can find a lot of free stock photos on the internet.
But I found that when I was searching in the free galleries, every time I would spend an infinite amount of time trying to get something good enough. That’s why I’d rather pay a small fee, but avoid myself the pain of wasting a lot of time.
There are a ton of alternatives you might prefer. For example: Pixabay (free), depositphotos, or Pexels.
PicMonkey
Once I have my featured image for my next post, I put it into PicMonkey to have something shareable on social media. On the home page, I choose Edit / Computer and pick my featured image.
Then, you can play with your picture and add many effects. The almost only feature I use though is to add text on it. In a matter of minutes, you get your featured image with your blog post title, making it easily shareable on social media.
For example:

Canva
Canva is similar to PicMonkey in that it will help you edit an image to add some text or other effects.
You can choose among thousands of layouts, then add text, other elements like shapes, charts, icons, etc.
I very rarely use Canva, as I prefer choosing a stock photo and just adding some text on it. But I know a lot of people who use it and are very happy with it. So give it a try! Here is a social media friendly image I made in just a few minutes:

Skitch
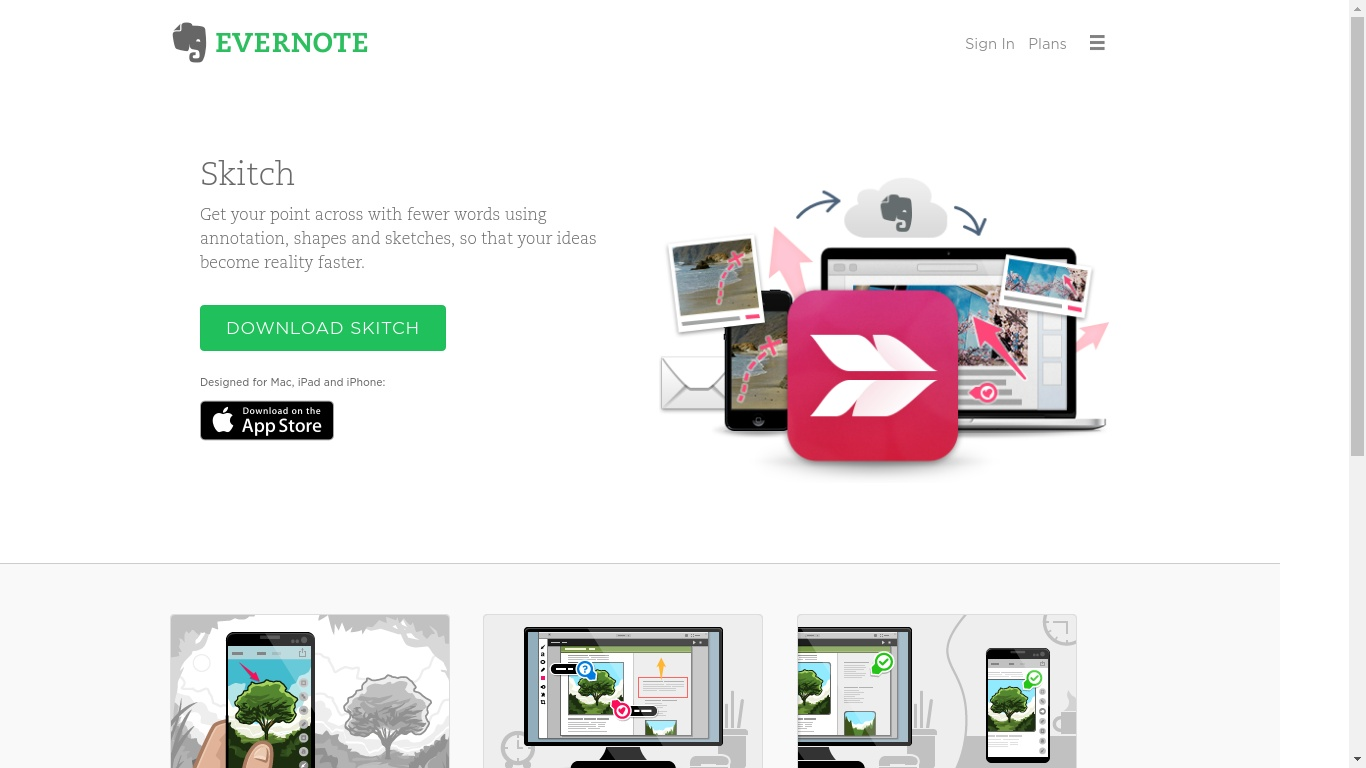
Skitch is amazing! Have you already noticed these bloggers who annotate their screenshots or add pink arrows to it? Sometimes the arrows are red, as in this article. Well, these annotations are made with Skitch!
Now, I have a bad news for Windows users: Skitch is not supported on Windows anymore…
But don’t worry! There is a turnaround. I use Windows and still have access to Skitch. In fact, it is implemented in Evernote. Here is what to do:
- Open Evernote.
- Create a new note.
- Copy/Paste your image in the note.
- On the top-left corner of the image, click the @ (for Annotate).
- You can now annotate your picture!

Piktochart
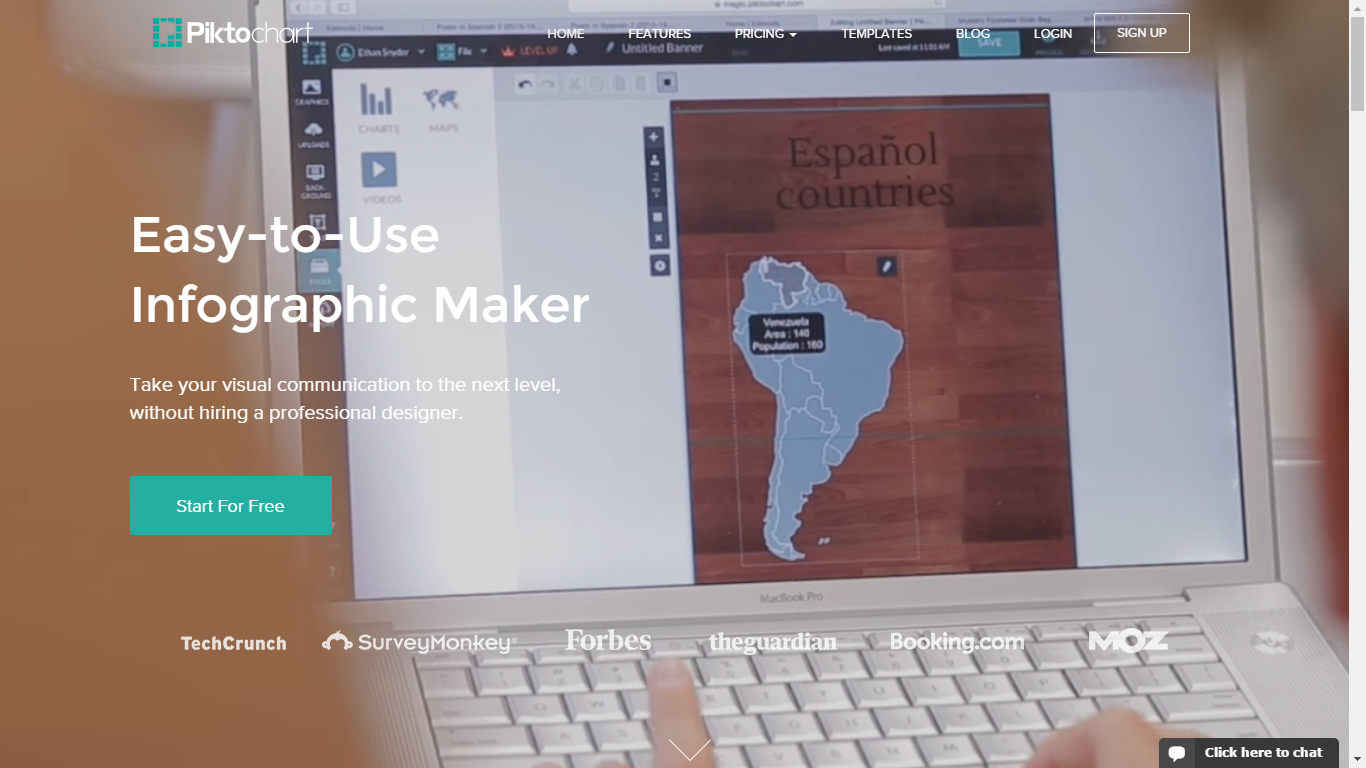
A great way to enhance a post, or to create a content upgrade, is to make an infographic.
At first I thought it was super complicated to make one, but no, it’s super simple in fact! Very similar to Canva, you simply:
- Pick a template
- Add elements such as charts, icons, photos, etc.
- Fill it with your writing.
And that’s all! All the hard work of design is pre-made in the tool. The best part: It’s free!
Meme Generator
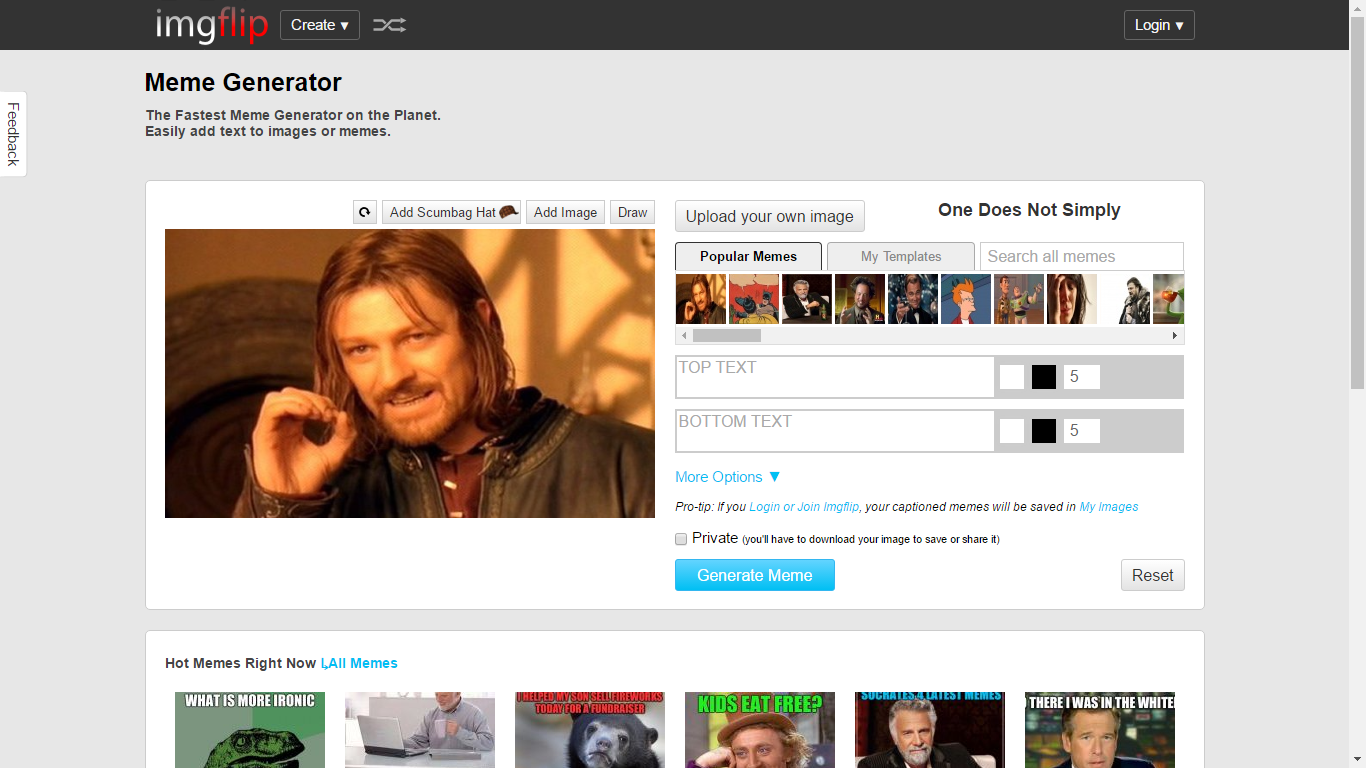
A great way to illustrate your blog posts and add a funny touch into it is to create a meme. It is very simple to do so:
- Pick your meme image (or upload your own).
- Add your text (be creative).
- Click Generate Meme.

Tools to Promote the Hell of Your Post
You have created the BEST article on a topic. Now what? How are people supposed to know it exists?
You PROMOTE it! This is a crucial step that will make or break your blog post. You share it with your email subscribers, you talk about it to your friends, you post it on social media, and you reach out to as many people as you can to get the word out.
Here are what the experts say on how to promote your post efficiently:
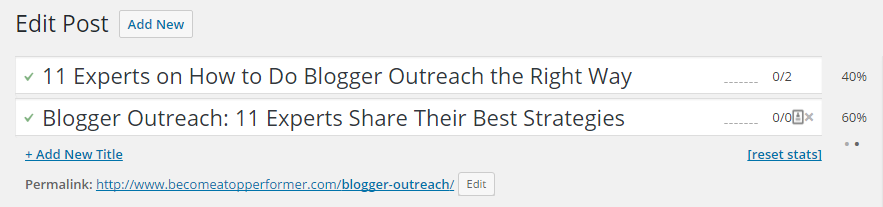
- 11 Experts on How to Do Blogger Outreach the Right Way
- Blogger Outreach: How to Get Influencers to Promote Your Content For Free
- Become a Super Connector: How to Work With 1,000+ Influencers
It can be a very long and daunting process to build relationships with influencers. Fortunately, a lot of tools can help you achieve similar results.
Buffer
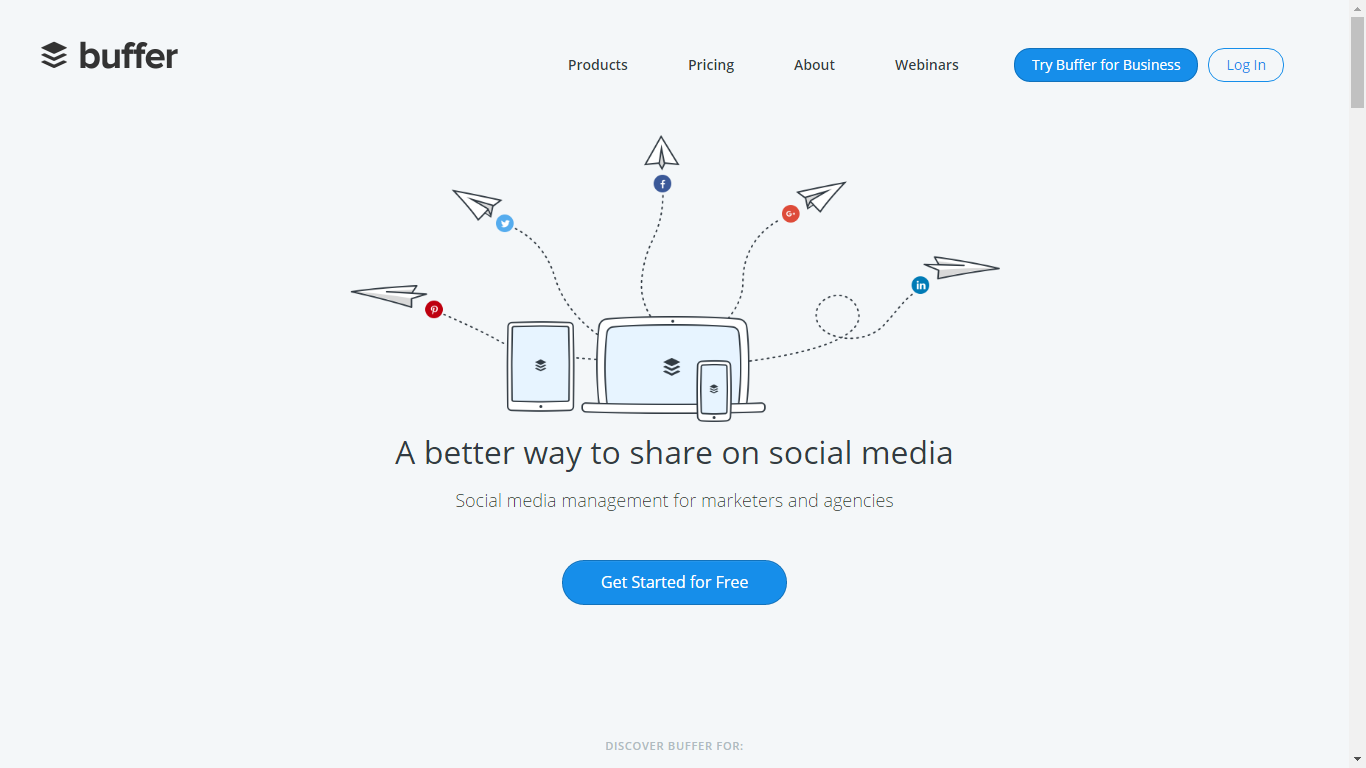
Buffer will allow you to schedule the sharing of your content easily on multiple platforms.
You can add your Tweets (or Facebook shares, or other platforms) directly in the Buffer interface, but really what’s best is to use the browser extension. As I browse the internet, if I stumble upon a good article I’d like to share with my audience, I can directly buffer it to share it multiple times in the next few days.

Of course, you can do the same to promote your own articles.
SumoMe Sharebar
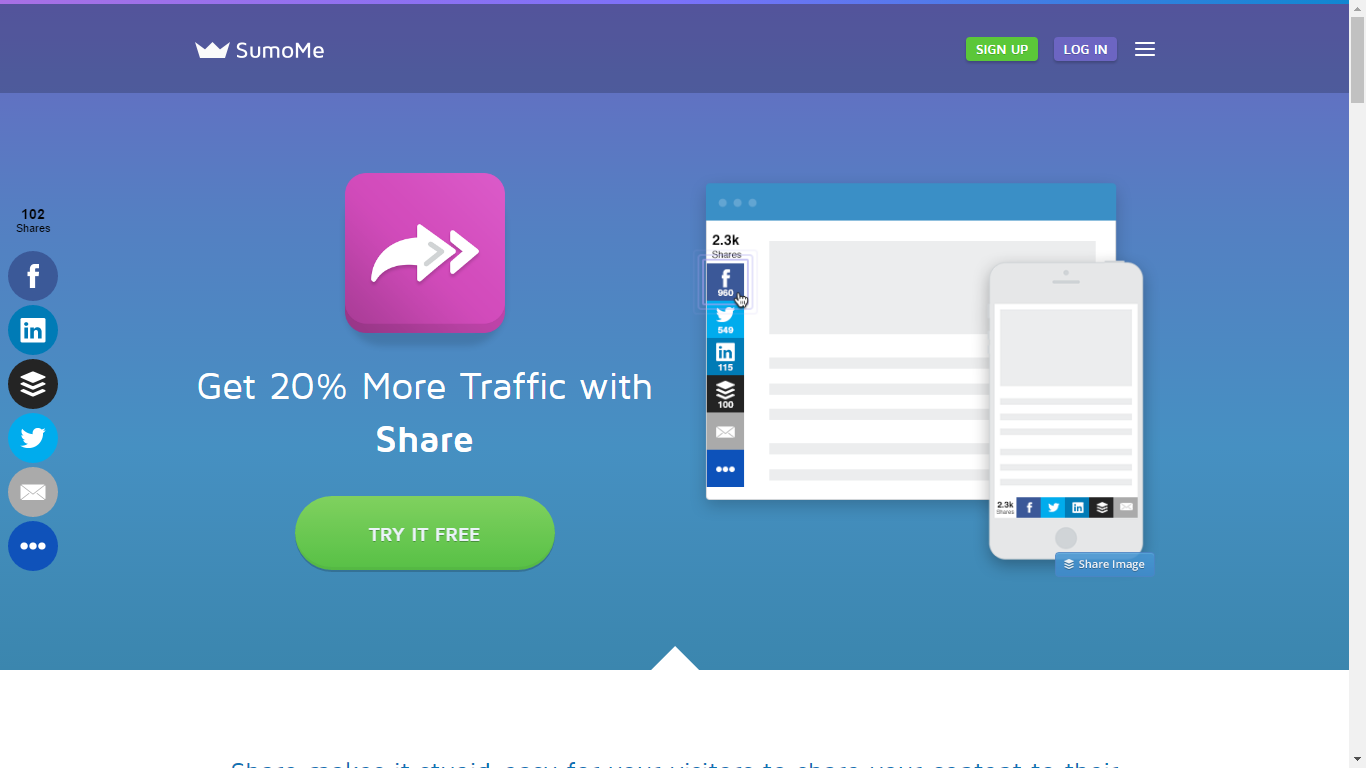
The Sumome Sharebar is a WordPress plugin that will add a small bar at the left of your blog post and allow your visitors to share the article in just 2 clicks.
It is really easy to set up and here is what you’ll get:

If you want to get the tweet count, you will need another app, as since November 20, 2015, Twitter stopped showing share counts. You will need to use TwitCount to get it back.
Ninja Outreach
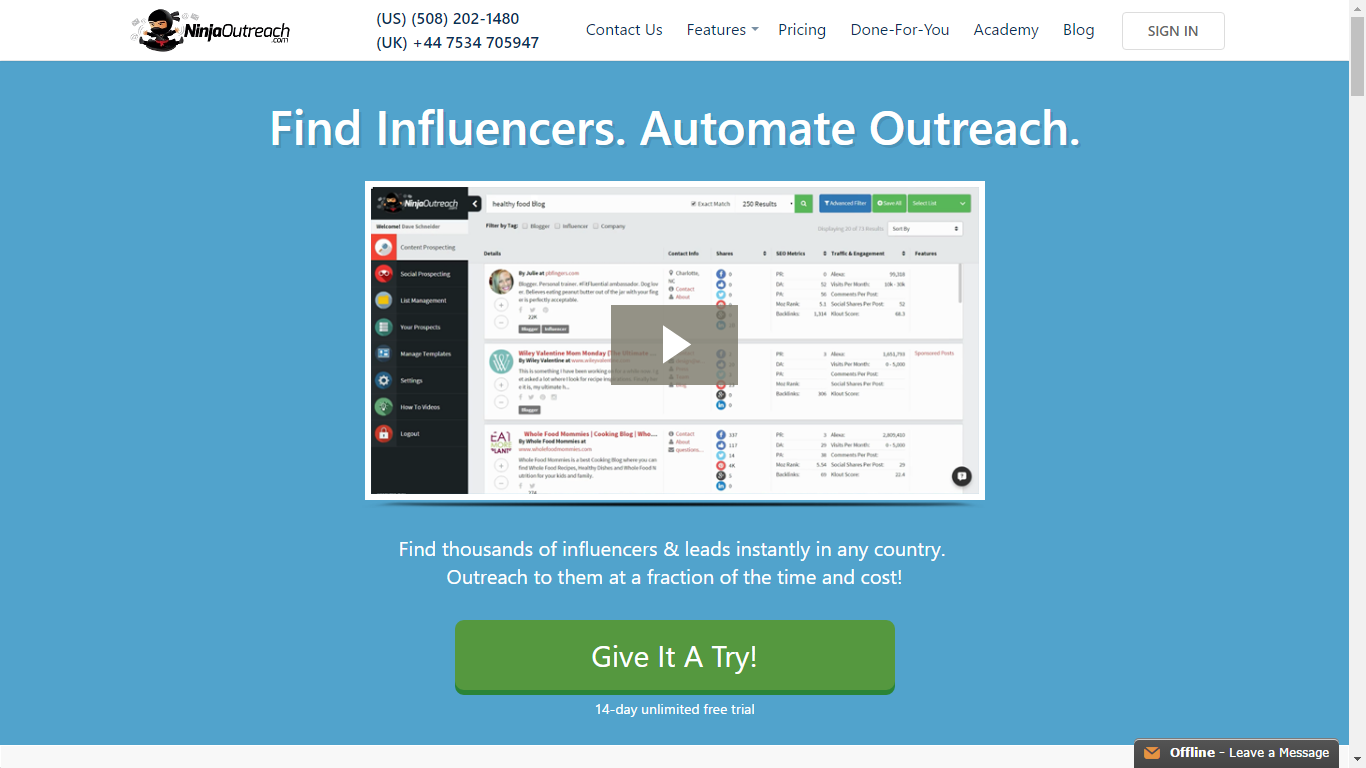
Ninja Outreach is a tool that will allow you to systematize and almost automate reaching out to people to let them know about your latest blog post.
This is not for spamming hundreds of people with the same template. You still need to build relationships with people, bring value to them, and be authentic if you want them to share your posts.
However, this tool will allow you to set up lists of influencers and then to email them quickly (you will have the option of personalizing your emails, even if you create a template). You can also find new influencers very easily.
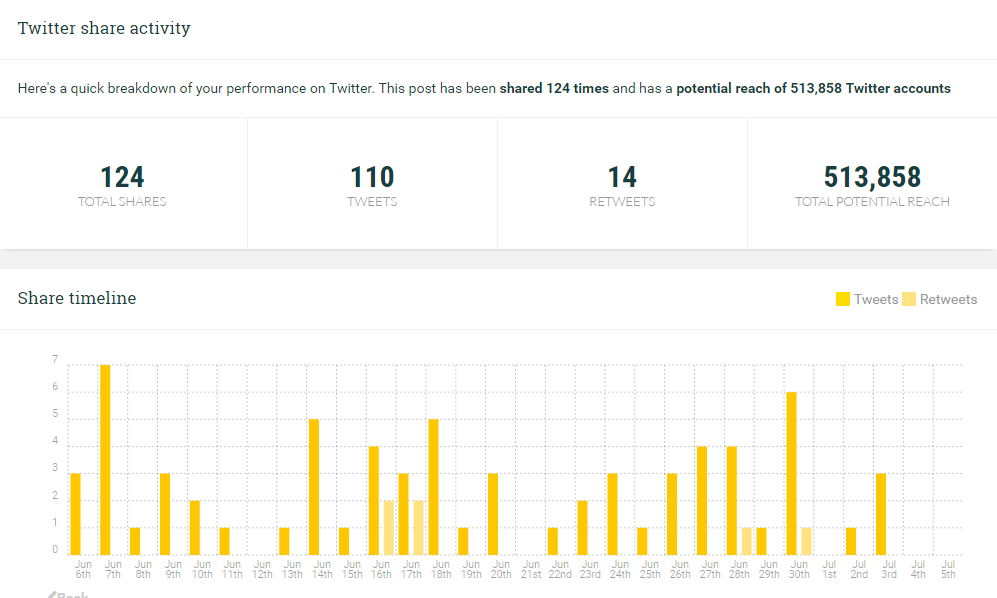
PostReach
PostReach is not a tool to promote your content directly, but it will help you to measure how many shares it got, through which channels, and also discover the influencers who promoted it.
You can give your website name so that PostReach directly track your new blog posts, but also tell him when you publish a guest post on another website.
For each blog post, you have access to a detailed report giving you a bunch of information on how the article has been shared. For example:
Tools You Wouldn’t Even Think Of
There are many tools I use on a regular basis that I would have never known they exist. Even if they are of great help, you’re so used to doing it your way (that is painful and tedious) that you don’t even try to Google to see if there is an easier alternative.
In this last section, you will find many tools that will your life as a blogger a lot easier.
Let’s get started!
Screencastify
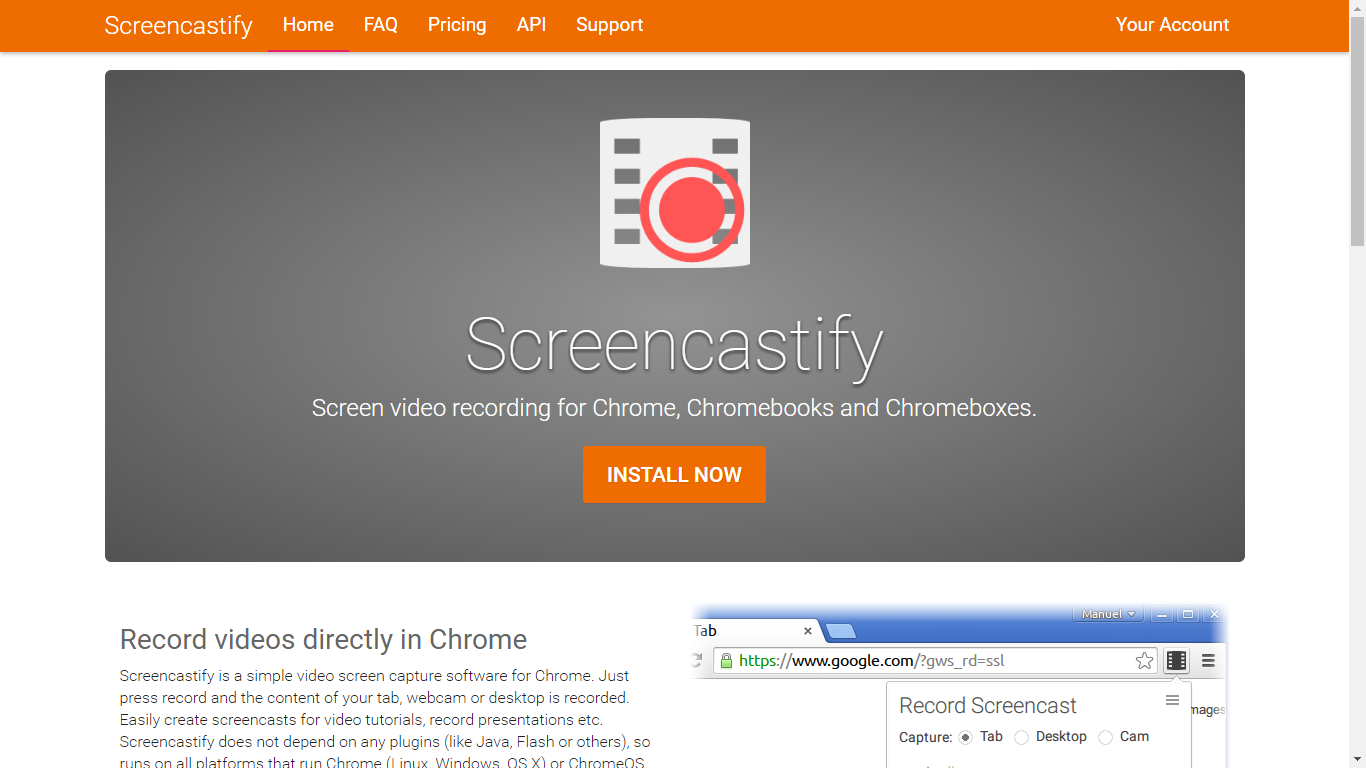
Screencastify is a free video recording tool that will help you make quick and easy videos of your screen.
Imagine that a friend of yours or a reader asks you a question, and you want to answer but it’s gonna take hours to write a really thoughtful answer since a lot of explanations are needed. Sometimes, a picture is worth 1,000 words, meaning it’s much easier to SHOW something instead of trying to describe it.
In just a few clicks, you can start recording your screen. Once done, it will automatically upload the recording on Google Drive for example, so that you can share it easily.
Amazon Mechanical Turk

Sometimes you need to do repetitive and boring tasks for your business. It might be finding new websites to guest post for, influencers to find, reformatting a document in a robotic way, transcribing a video, etc.
Sometimes, these tasks don’t really require YOU to do them, it could be anyone with a brain. In this case, you should give Mechanical Turk a go.
You can set up a task and pay people to do it at a cheap cost.

Trello
Trello is a productivity tool that can help you manage your blog articles (as well as your to-do list, your Kanban board, your long term projects, and many other things).
For example, by creating a board for your articles, you can then add all your blog post ideas in a first list.
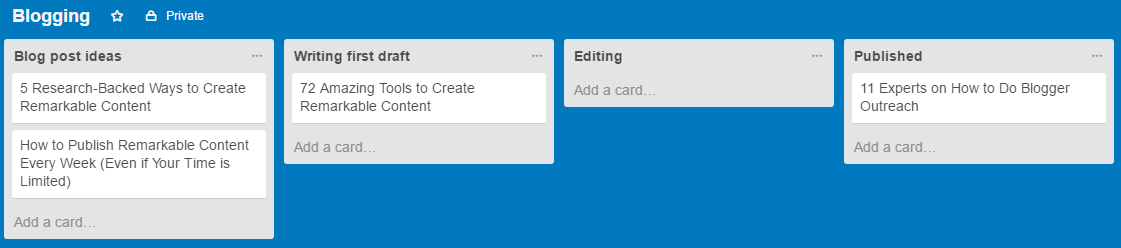
Then, every time you write a first draft, you drag and drop the idea in the second list called “Writing first draft”. As you make progress on it, you drag the blog post to the right until it gets into the “Published” list.
As you get more and more articles in progress, this can be a great tool to manage them.
oTranscribe
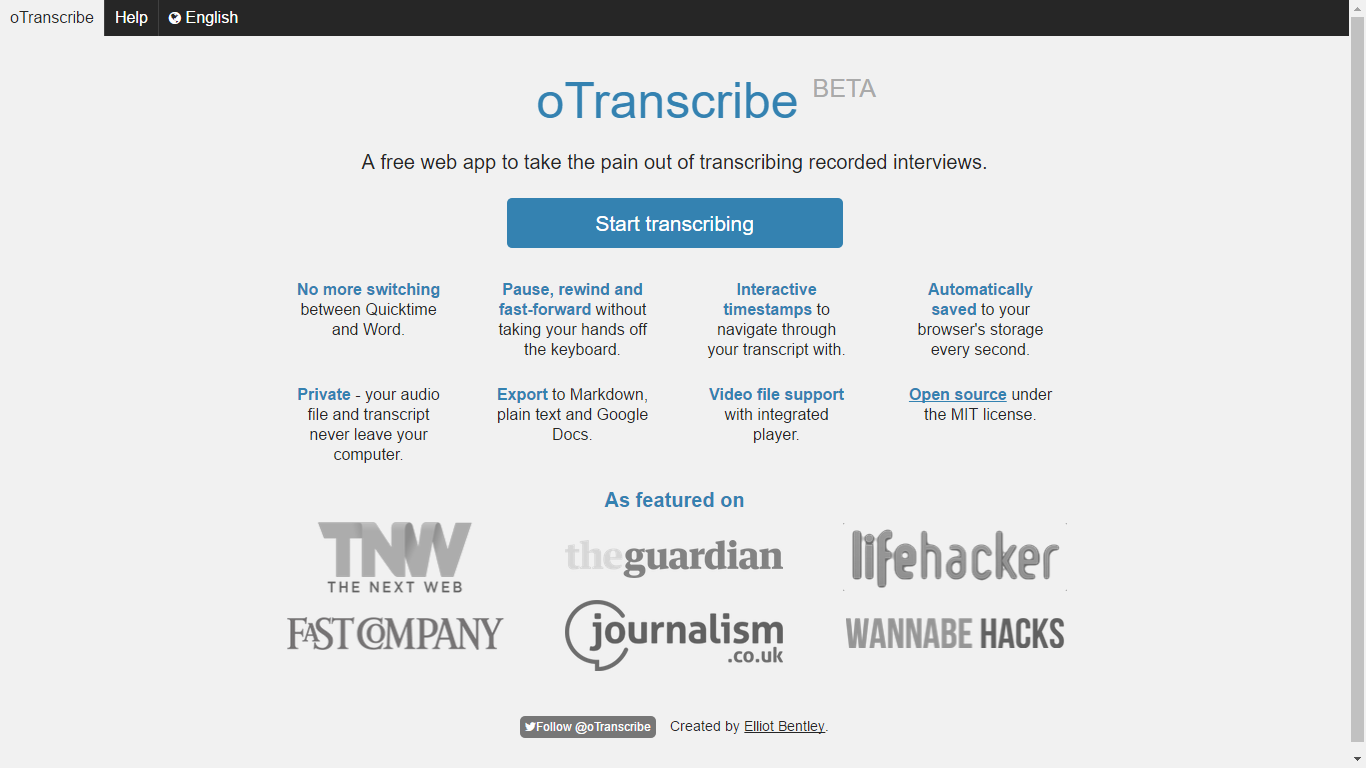
Have you already tried to transcribe an interview or a video you recorded yourself?
If yes, you know it’s HUGE pain. You find yourself always switching back and forth between your text editor and the video, returning a few seconds ago, repeating again and again, always switching windows, making miss clicks and… it’s a mess.
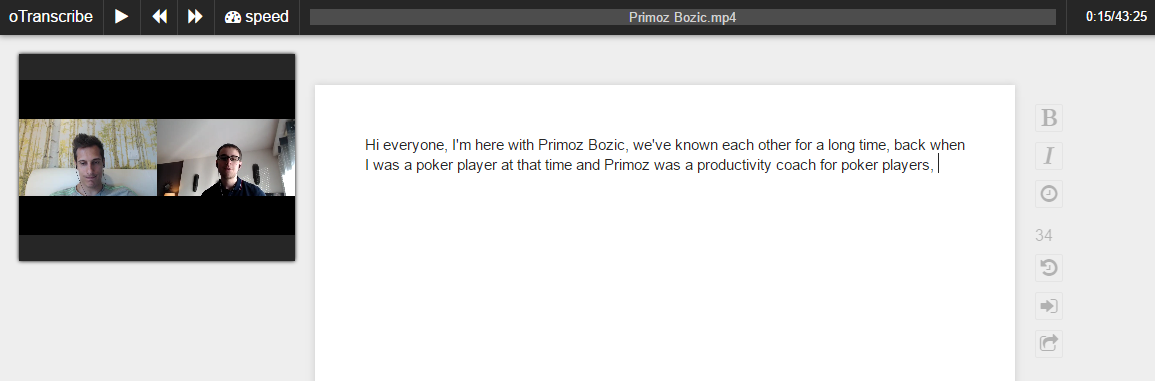
oTranscribe makes it much easier. With just a few key shortcuts (basically, Esc to play/pause the video) and a few minutes of practice, you can write continuously on your transcription and finish a lot quicker than with the previous technique. This is a huge time-saver.
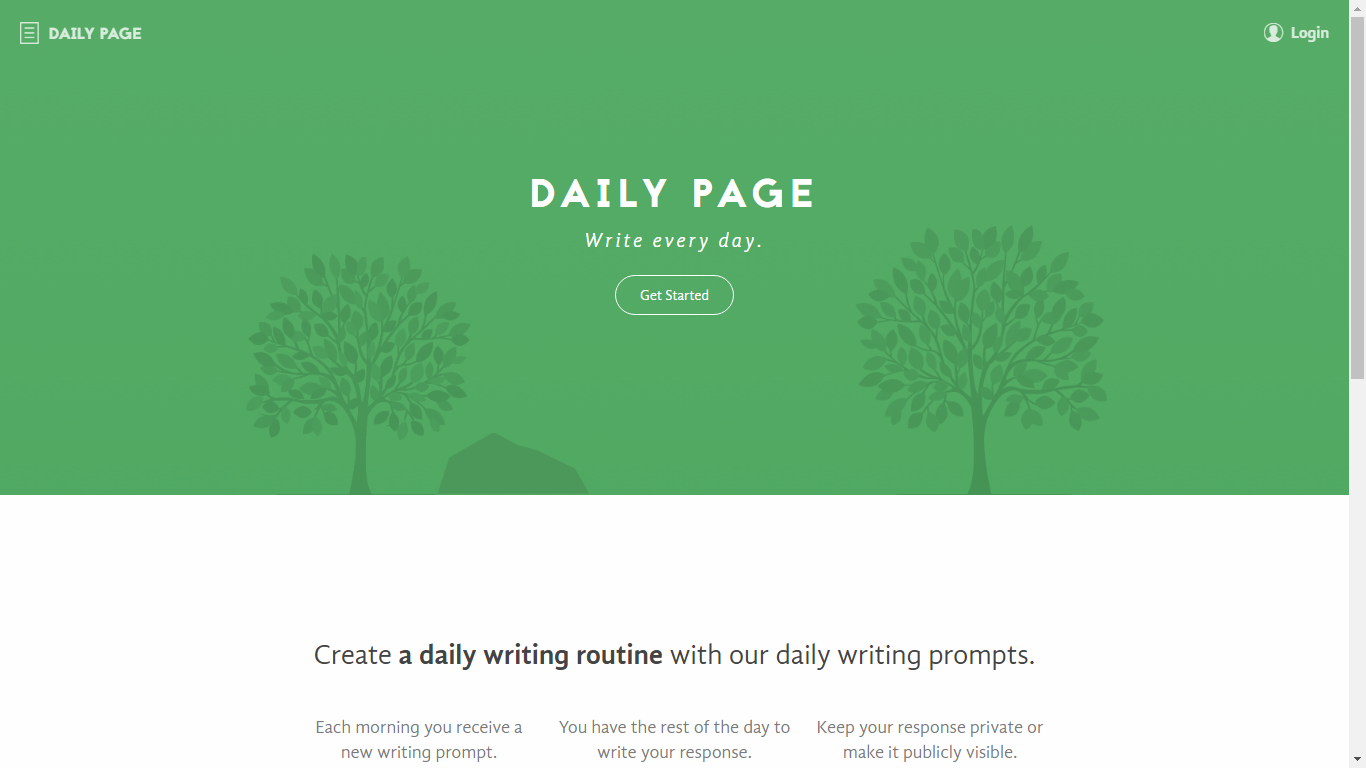
Daily Page
Writing is the most important skill you can ever develop for your business. Everything involves writing, whether it’s creating content for your readers, creating a product, or connecting with your subscribers.
You just need to write, and there is no turnaround.
A bad news is that we’re all bad when we start writing. The good news is that you can better if you practice consistently. And what better way to get consistent practice than with writing every day?
That’s what Daily Page proposes you: Daily writing prompts to write daily and get a ton of practice. To increase your motivation, it also provides reminders and personal stats to see your progress.
PhraseExpress
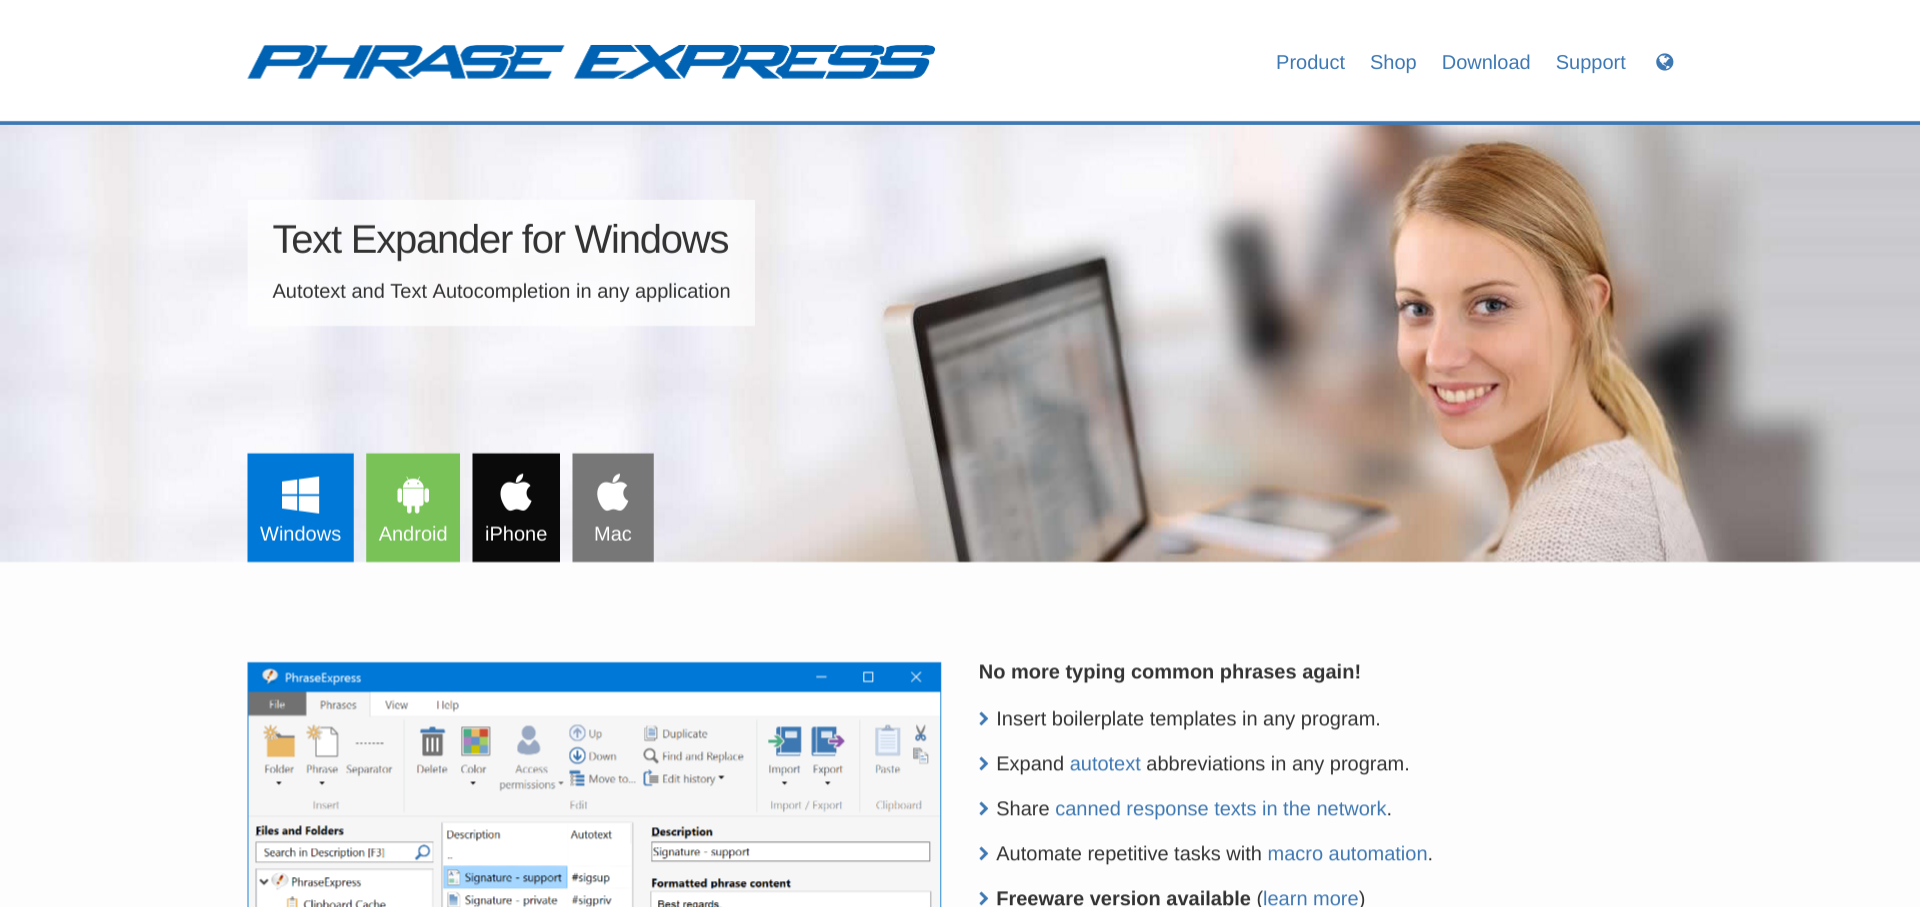
PhraseExpress has the potential to save you a lot of time without even you noticing it.
It has many features, but the one we’re interested in here is the Autotext. You can set up abbreviations and PhraseExpress will automatically expand them into the full words or sentences.
For example, you could just type sig to get your full signature typed up.
If you tend to use the same long words again and again when writing your blog post, this tool will save you a lot of time.
An alternative for Mac users exists, it’s called TextExpander.
Your Getaway
This is a HUGE list of tools for creating remarkable content. I tested a ton of other tools but decided not to include them for many reasons. Sometimes because there are better alternatives, sometimes because it was plain broken, or because it wasn’t really essential to the remarkable blogger.
The goal wasn’t to make the longest list ever, but to present only high-quality tools. Even with this in mind, the list is overwhelming.
My recommendation is that you keep it close with you, so that every time you face an issue, you can come back at it and find a solution.
To help you keep the list and refer to it later when you need it, I created a condensed version in PDF that you can download right now by clicking here.

Guest Post
Join over 40,000 people who have taken our 6 part freelance writing course. Sign up below and let’s do this together.
By entering your email address you agree to receive emails from Location Rebel. We'll respect your privacy and you can unsubscribe at any time.


Excellent! Thanks for sharing this
Thanks 🙂
Wow. Charles, Sean – thank you for making this resource available.
I kept shaking my head in disbelief as I read the article:
“OMG. There’s an app for this?”
Then 3 paragraphs later:
“WHAT?! There’s an app for THIS too?”
I feel like I’ve been transported to a new world. Beam me up, Scotty!
I particularly liked the tools that generate blog post ideas.
Also – OmniOutliner? I am in love.
Charles, I can’t even begin to fathom the amount of research that must have gone into this (not to mention the screenshots!). Thank you for doing the work so we don’t have to 😀
Awesome guest post!
PS: And thanks for the kind words on the article I wrote for Sean a while back. Glad to hear you enjoyed it.
Haha! I’ve also discovered a ton of apps that I didn’t even think of before writing this article.
OmniOutliner seems great, and in fact any outliner that allows you to keep zooming in. That’s exactly how I’m used to write, so having the tool that fits the framework makes things a lot easier.
Thanks Alp 🙂
That’s a mindblowing post Charles, full of helpful advice.
I had to check and install some of the tools right away after reading it 😉
I’ve now finished the first draft of my new post so I’m gonna try out the tools for editing and improving my headlines which is always a big pain for me.
I might as well consider buying Mac to be able to use OmniOutliner :D.
Again, excellent post Charles and thanks Sean to bring it on here!
Ha ha, not sure if it’s worth getting a Mac for it, but if I had one, I would try it for sure!
Charles, this was fantastic – THANK YOU!
It’s always been my nature to hate having to sift through online tools and try to figure out not only what the purpose of them is but how to use them. You did all the heavy lifting for us, explaining everything in plain English about the benefits, comparisons, and how to use each (with screenshots nonetheless), in a way that didn’t make me feel stupid for not knowing all this amazing stuff. Bravo!
Now, off to write some outreach pitches for my narrowed-down list of places that authentically resonate with me, have solid traffic, and a highly engaged audience while listening to some rain.
Sean – great job on featuring incredible value-adding bloggers 😉
You’re welcome Camille 🙂
This actually makes me think I didn’t find any tools to generate such a “narrowed-down list of places”. That would be really valuable though.
Thanks Charles,
This is an absolutely epic article! Huge amount of research must have gone into this. Lots of tools here that I didn’t know about. I’m a really passionate believer in mind maps when organising ideas and information. I use a free one called Simple Mind.
Do you know what became of a a service called ContentMarketer.io? If you wrote an article that mentioned other blog posts, you could just enter the URL of your article and CM would find email addresses for all the bloggers mentioned in your article. It seems to have disappeared.
Thanks for sharing!